How to paint a bird feeder with your own hands. Wooden feeder with flat roof
February 22nd, 2016
To make a bird feeder, you need to have a few simple things and tools. You can make a feeding trough with your children, but keep in mind that you need to watch every step, since during the construction process sharp things are used - scissors, knives, screwdrivers and even, sometimes, a saw. There are many options for feeders - made of plywood, plastic bottle, tin can or cardboard.
Here are the most interesting, popular and original ideas creating a feeder:
Feeder made from scrap materials: toilet paper rolls
You will need:
1 bushing from toilet paper
Peanut butter
Small bowl
Plate
A couple of branches
Strong thread or fishing line
Knife (dull or plastic).
1. Connect two branches or sticks together using hot glue or string. You can skip this point if you make 4 holes in the sleeve (see below).
2. Make holes in the toilet paper roll so that you can thread two branches or sticks through them. It is better to make 2 holes: a little higher and 2 slightly lower (see image). This item is not required, because The sleeve can be put on differently.
3. Place the peanut butter in a small bowl and use a plastic knife to spread the butter onto the surface of the cardboard toilet paper roll.
4. Sprinkle feed over the coated sleeve. peanut butter.
5. Repeat steps 3 and 4 for 4 more bushings.
6. Tie a strong thread to the connected branches so that the structure can be hung.
7. Hang all the cardboard tubes on the branch structure, and then hang everything on the tree.
Feeder made from a plastic bottle. Option 1.
You will need:
Any plastic bottle
Ribbon, thread or fishing line
Awl or drill (for making holes in the bottle and plastic cap)
Bolt and nut
Stationery or simple knife (if necessary)
Deep plastic plate.
1. Prepare a plastic bottle. Remove the label from it, wash it well and dry it.
2. Make a hole in the middle of the lid and plastic plate.
3. Attach the lid to the plate using a bolt and nut.
4. Make a hole in the bottom of the bottle (bottom).
5. Make several holes on the side (4-5), near the neck of the bottle, so that the food can spill out when you turn the bottle over. Holes can be made with a stationery knife if the bottle is not too dense.
6. Take the ribbon, fold it in half, and tie the ends in a knot. Thread the ribbon through the hole at the bottom of the bottle.
Now you can pour food into the bottle, screw on the cap and turn it over. The ribbon will allow you to hang the feeder on a branch.
Bird feeder made from a plastic bottle. Option 2.
You will need:
Plastic bottle
Plastic container
Strong thread or fishing line
Screwdriver or nail
Knife (simple or stationery).
1. Remove the cap from the bottle and the cap from the container.
2. Place the bottle cap on the container cap (in the center) and trace with a pen, felt-tip pen or pencil.
3. Using a utility knife, cut a hole in the lid of the container. The hole can be made slightly smaller than the diameter of the bottle cap.
4. Make one hole along the edges of the container lid.
5. Make a hole in the center of the bottle cap. The hole should be large enough to allow bird food to spill out.
6. Place the cap on the bottle and then insert the bottle into the hole in the container cap.
7. Tie a strong thread to the bottle and put the cap on the container.
Now you can pour food into the bottle or pour water and hang the feeder on a tree.
How to make a feeder from a box (photo instructions)
Original polymer clay feeder
You will need:
Polymer clay
Rope
Thick wire or piece of aluminum
Baking bowl or any other utensil that can be placed in the oven
A small piece of fabric.
1. First roll out the clay on a flat surface until it is about 6mm thick.
2. Carefully place the rolled out clay inside the baking bowl. Trim off any excess pieces so that the clay lies flat. Make 3 large holes in the clay for the rope.
3. Place the bowl of clay in the oven. Read the clay instructions carefully to know how long it takes for the clay to harden in the oven.
4. When the clay has hardened, carefully remove it from the bowl, tie three pieces of rope to it - tie a knot at one end of each rope, and insert the other end into the hole of the clay plate.
5. Tie all ends of the rope and secure them with wire.
6. It is advisable to place a small piece of fabric inside the plate so that the birds do not accidentally peck the clay along with the food.
Original do-it-yourself pumpkin feeder
You will need:
Small pumpkin
Wooden crossbars (even branches can be used)
Thin wire.
1. You need to cut off the top of the pumpkin.
2. Using a knife or screwdriver, make 4 holes in the pumpkin to insert branches or wooden slats into. Make 2 opposite holes at the same height and two other opposite ones slightly lower - this way you will have one branch slightly higher than the other.
3. Take a thin wire and wrap it around each end of the branches so that the feeder can be hung on the tree. Connect all the ends of the wire so that the feeder can hang evenly. Twist them into a hook.
Original DIY bird feeder idea
This feeder is suitable for sub-zero temperatures.
You will need:
Large plastic bottle
Small plastic bottle or small plastic container
Scissors
Coniferous branches
Berries (optional)
Seeds
1. Cut off the bottom of a large and small plastic bottle. First you can make a hole with a knife and then cut with scissors. You will have the base of the feeder.
2. Place spruce branches, berries and seeds in a circle in the cut-out bottom of a large bottle.
3. Place the bottom of a small bottle or small plastic container in the center of the base.
4. Pour earth, sand or pebbles into a small container.
5. Tie strong threads or fishing line to the feeder so it can be hung.
6. If you put the feeder in the freezer overnight, and then take out and remove the plastic parts, you will get an ice feeder.
How to make a feeder with your own hands using a bottle
You will need:
Small glass or plastic bottle (preferably with a cap)
Small saucer or bottom of a plastic bottle
Wire
Saw (if necessary)
Screw half ring (hook).
1. Using screws, connect two small pieces of plywood. In this example, the dimensions of the plywood are 11 x 15 cm and 31 x 15 cm.
2. Using the bottle that you will later attach to the stand, mark the places where you will need to attach two pieces of wire - one at the neck, the other at the bottom of the bottle.
3. The neck of the bottle should be approximately 3-4 cm above the base.
4. Drill holes for the wire, insert your wire through the bottom, wrap it around the bottle and secure it with reverse side plywood (you can twist the wire or secure it with a stapler).
5. Fill the bottle with seeds, screw the lid on so as not to spill the seeds, turn it over and insert the bottle between the wires, place a saucer under it and remove the lid.
6. Screw a half-ring screw into the top of the plywood to hang the feeder.
Original DIY bird feeder
You will need:
Tin can (preferably with a lid)
Sisal rope (sisal rope) or thick rope
A piece of thin plywood, a branch, or any small metal piece
Hot glue.
1. If you have a jar with a lid, then the lid needs to be bent in half.
2. Take a small branch, piece of plywood, or other small piece that birds can perch on and glue it to the jar.
3. Insert the bent lid as shown in the image (slightly inside the jar and over the metal part) and secure it with glue.
4. Take a thick rope or rope about 80 cm long and start wrapping the can so that the long ends of this rope (30 cm) remain at the beginning and at the end. Use glue to secure the rope to the can.
5. Cut the rope, tie the ends in a knot and secure with glue.
You will need:
3/4 cup birdseed
1/4 cup water
1 packet of gelatin
Twine or strong thread
Cookie pans
Baking paper.
1. Mix gelatin with water (1/4 cup) and bring to a boil, stirring. Make sure the gelatin is completely dissolved.
2. Remove from heat and let cool.
3. Add 3/4 cup birdseed. You can add more if it fits.
4. Place the cookie cutters on baking paper and fill them with the resulting food mixture.
5. Cut a piece of thread and tie its ends in a knot. Partially insert the thread into the mixture.
6. Leave the mixture to dry overnight, making sure to turn it occasionally when you have time.
7. Remove the molds and hang the food on the tree.
How to make your own bird feeder using tin cans
You will need:
3 cans of paint or cans
A piece of branch or wooden stick
Hot glue
Paints (if desired).
You can paint the jars, or you can leave them as is.
1. Glue a piece of branch to a jar for the birds to land and eat.
2. Wrap strong thread or ribbon around the jar and tie the ends in a knot. You can secure the tape with glue so that it sticks better to the jar.
3. Fill the jars with food and you're done!
How to make a bird feeder from a plastic bottle
You will need:
Plastic bottle (1.5 l or 5 l) or canister
Sharp scissors or utility knife
Winter time is a serious test for birds. Every day it becomes more and more difficult to find food. Take care of the birds - hang a feeder made with your own hands from the simplest materials at hand, which we usually throw in a landfill. We have selected photos and original ideas for making feeders that do not require special skills or complex drawings.
How to make a bird feeder with your own hands?
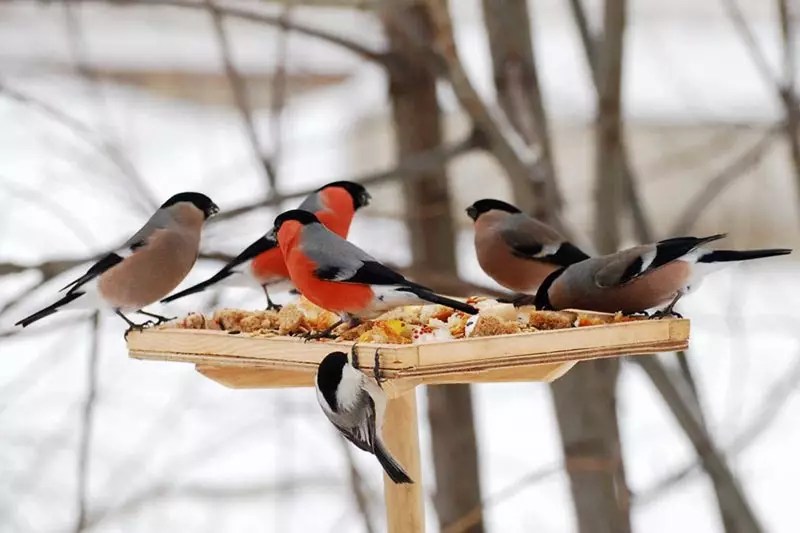
Having accustomed the birds to the feeder, you will be able to observe the entertaining avian bustle and the secret life of birds.
Some of them defend their rights in fights with relatives, others enter into competition with other species, but without exception, all of them carefully look around so as not to miss the attack of a small hawk, which is very interested in visitors to the feeder.

A simple bird feeder will bring great benefits to birds
Materials for making a feeder can be very varied, but there are some general rules design:
- the feeder should, first of all, be convenient for the birds; there should be no difficulty in removing food;
- The roof and sides will help protect the food from snow, rain and wind. Exposure to moisture can cause food to deteriorate and become moldy, which means it will turn into poison for birds;
- It is desirable that the material from which the feeder will be made be resistant to moisture, otherwise such a design will not last long and a new one will need to be made;

The feeder must be safe: have no sharp sides and be located high enough above the ground
- walls and corners should not be sharp or prickly;
- feeders for small birds are not made large sizes so that larger and more aggressive species do not encroach on their food;
- It is better to place feeders on tree branches or attach them to the walls of outbuildings at a height of about one and a half meters, so that cats do not offend the birds, and it is convenient to sprinkle food on your feathered friends.
Advice. Birds get used to a permanent feeding place and are ready to travel many kilometers to the feeder. Therefore, feeding must be constant, otherwise the birds may die.
Plywood bird feeder
You can buy a feeder in a hypermarket, or you can make it yourself in a few hours. A plywood feeder can be made open, with a flat or gable roof, and a bunker compartment can be provided if you cannot constantly monitor the amount of feed in the feeder. Of course, you will need drawings, fortunately, there are plenty of them on the Internet with ready-made dimensions of parts for cutting. Choose a design that you like, the drawing will make the work easier and guarantee that in the end you will get exactly what is shown in the photo.

Lightweight and durable feeder made from plywood sheets
When choosing a design for a future feeder, consider the bird population in your region. Jays, pigeons and magpies can eat all the food, leaving little titmice hungry. To prevent this from happening, make the size of the feeder openings such that large birds cannot reach the feed.
So, you will need a hammer, an electric jigsaw, nails of a suitable length, water-based glue, sandpaper, plywood, 20 x 20 mm timber. Let's look at a simple feeder.

Ideas and drawings of a bird feeder made of wood
Wooden feeders are attractive because they last a long time and keep their shape well - this is due to the properties and reliability of wood. To make such a feeder you will need at least minimal skills in working with tools and a drawing. The board for production should be 18 - 20 mm thick. Let's consider the option of making a feeder, which you can do yourself or take a photo as a basis for a drawing. We will need a beam measuring 4.5 x 2 cm for the racks, a square of plywood 25 x 25 cm for the bottom, two pieces measuring 35 x 22 cm for the roof, nails, screws and glue.

Feeder made of wooden beams

Such a feeder can be installed permanently on a dug-in post or drill two holes in the ridge, screw in a screw with a hook and hang it on a wire. Several birds can fly up to the feeder at the same time, the food is protected from the wind by the sides and roof, the feathered friends of the garden will love such a cozy dining room.

Finished wooden feeder
If you have a gazebo on your site, hang a simple feeder there without a roof. It is enough to make a side and a bottom. If you want to paint the feeder or open it with varnish, then use water-based compounds so as not to harm the birds.
Advice. To prevent the wood from splitting, you need to make the tip of the nail blunt, and drill a hole for the screw before screwing it in.
Making a feeder out of cardboard (suitable for children)
One of the most simple feeders. The cardboard version is interesting because it can be made in a place with children and at the same time have a great time with them. This would be a great craft for kindergarten or primary school. There is a lot of room for creativity here. Cardboard is an excellent option; it is only afraid of direct water. But if you want to play it safe and make the feeder more resistant to moisture, then you can glue the external elements of the feeder with wide tape, especially its upper and lower parts. In a forest or park, such a feeder can easily last all winter and part of spring.

Collage of a cardboard feeder. Photo livemaster.ru/topic/179659-delaem-kormushku-iz-kartona
The set of tools and materials is minimal, and if you don’t have something from this list, you can always find a replacement. So we will need these materials and tools:
- A couple of sheets of cardboard (A4 format or more);
- Ruler;
- Scotch tape (for structural reliability);
- Stationery knife;
- A rope or piece of nylon rope to hang the feeder;
- Pencil or felt-tip pen;
- Cardboard glue or glue gun;
- Hole puncher.
If such a feeder is going to take a prize, how best craft in your kindergarten, then you will have to work a little in terms of external design. Here our cardboard will give a head start to any Tetra-Pak (this is a milk or juice carton), you can beautifully draw on it and decorate it in every possible way. Undoubtedly, the prize from kindergarten will be yours!
Pumpkin feeder
But here, as they say, words are unnecessary - everything is visible in the photo collage. I would like to add that such a feeder looks very attractive and unusual and will be a real decoration of your garden, this is due to the shape of the feeder and its color, which looks great against the background of white snow. 
This option is also suitable for making with children. And such a beautiful, bright craft will definitely not go unnoticed in kindergarten.

Bird feeder from a box (package) Tetra Pak) from juice or milk
You can make a feeder from a milk carton or a juice tetra pack, like this. Even a child can do this. For this you will need:
- a clean juice box;
- a piece of nylon rope or wire to hang the feeder;
- adhesive plaster;
- marker;
- scissors or stationery knife.

Milk carton bird feeder
First of all, mark and cut holes on opposite sides of the tetra pack. To make it convenient for the birds to take food and fly out. We cover the bottom side of the window with adhesive tape for the convenience and safety of the birds. We poke a hole under the holes with scissors and insert the cardboard rolled up into a tube, which is left over from cutting the holes above. In the bent corners we make small holes for wire or rope. And we tie it to a branch.
The feeder can be attached to a tree trunk. Such a feeder will not sway in the wind. To do this, feeding slots are made not on opposite sides of the bag, but on adjacent ones. On the opposite side we fix the wire in the slot and screw it to the tree.

Horizontal feeder made of tetro pack
You can make a feeder out of two juice bags. We cut the first package along the narrow sides, leaving the top uncut. From the second tetra pack we cut off the third part and cut a hole on the front side of the bag - this will be the feeding board or the bottom of the feeder. We combine the bottom with the first package so that we get a triangle. The parts can be connected with glue, wrapped with tape, or by piercing the bottom of the sides and inserting straws for cocktails.
Bird feeder made of plastic bottles 1.5 - 2 liters
Let's look at some variations of making a do-it-yourself feeder made from plastic containers.
Option #1. The simplest feeder
Symmetrically, on both sides of the bottle we cut out two holes: round, square, rectangular or in the form of an arch. There should be bridges between the holes. If you make a slot in the form of an inverted letter “P” and bend the plate upward, you will get a rain canopy. You can stick an adhesive plaster or fabric tape to the bottom edge of the hole - the edges will not be sharp and the birds will sit comfortably. We make symmetrical holes in the lower part and insert a stick - the result is a feeder with a perch.

A simple feeder made from a plastic bottle
You can attach such a dining room for birds to a tree by wrapping the jumper with tape, rope or other suitable material, as seen in the photo. If you make a hole in the bottle cap and insert the ends of the twine, and then tie them in a knot, you will get a loop that can be thrown over the branches of garden trees.

Be sure to make the edges of the plastic feeder safe - cover the cut areas with electrical tape
Option #2. Bunker feeder.
This design is rational to use because the feed can be poured in for several days. As the birds eat it, the food will automatically be added to the feeding area itself.

Hopper feeder made from plastic bottles
You will need two bottles of the same volume. We mark one bottle with a marker before cutting. We make holes at the bottom, as in feeder No. 1, and remove the top third of the bottle. We make two symmetrical holes at the top - a ribbon or twine will later be tied to them for hanging the feeder. In the second bottle we cut several holes at the narrowest part - food will pour out of them. Do not make large holes right away; it is better to expand them later. We pour food into the bottle, tighten the cap and insert the bottle into the first bottle, cut by a third.
Option #3. Feeder with spoon
We make a hole in the cork and insert twine for hanging. Then we make two holes symmetrically the size of the spoon. We cut a hole in the bottle above the bowl-shaped deep part of the spoon, slightly widening it so that the birds can take the food. Fill the feeder and hang it up.

Feeder with spoon
Advice. Using a hot needle or small nail, make several holes in the bottom of the feeder to drain moisture that gets inside.
Bird feeder made from a plastic bottle 5 liters
Probably in every home there is an empty five-liter plastic water bottle. Make a feeder in one evening to feed birds in winter period from this material it is very simple. Such a container will hold much more food than a smaller plastic bottle, as can be seen in the photo. Several holes will allow several birds to feed comfortably at once.

Feeder made from a five-liter plastic bottle
It's very simple and quick option, invite your children or other family members to take part in the manufacturing process: find ribbon or wire to tie the finished feeder to a tree branch, prepare a treat for the birds. Prepare a clean bottle sharp knife, pruning shears or stationery knife.
We cut the hole based on how we plan to secure the container to the tree:
- horizontally - cut a wide hole from the bottom of the bottle and the same from the neck;
- vertically - at a height of 5-7 cm from the bottom of the container, cut several square holes or three rectangular ones.

Materials needed to make a feeder
It is convenient to tie the bottle by the neck to a branch with wire or twine. If the feeder is made in a horizontal version, then use a knife to make two holes on the wall through which you pass the twine for tying. To prevent the feeder from swaying in the wind, place a quarter of a brick on the bottom to weigh it down, and load a treat on top.
You can also build a bunker feeder from a five-liter bottle. To do this you will need a five-liter bottle and two 1.5-liter bottles, a marker, a stationery knife and a rope.

You can place the feeder under the roof to make the birds more comfortable

With a little ingenuity, you can use the simplest plastic bottles to create unusual dining rooms for birds that will decorate your area.
Shoebox bird feeder
Everything is simple here. Take a thick shoe box with a lid. We make a round hole in the lid. The hole needs to be moved slightly from the center to the bottom edge of the box (a little different in the photo), this is necessary so that the birds can reach the food, which will lie at the bottom of the box.
We make a small hole in the top of the box and insert a tourniquet or rope through it. We tie an old pencil or stick to the end of this rope. We will then tie the other end of the rope to the branch of the tree on which we plan to hang the feeder. Then you can wrap the box with wrapping paper, but this is for aesthetic purposes, you don’t have to do this.
We make a roof from ordinary cardboard and put it on glue. Next, we glue the lid to the box itself with tape, as in Figure 3, 4, and also thread a rope through the lid.

At the moment when we hang the finished feeder on a tree, the roof may come unstuck from the box, but this is not scary, it won’t be able to get away anywhere, because it will be held by a rope.
And in the picture below is an even simpler version of a shoebox feeder. But there is no need to explain anything here, everything is already visible in the photo. The entire box is simply wrapped with tape, which, by the way, is very practical. And in our opinion, it turned out to be original and unusual.

Cardboard bird feeder
To make a bird canteen with your own hands, the simplest material will do, which is stored in abundance on the balconies of most families: boxes from electrical goods, cardboard packaging from food products. Choose thicker cardboard with a laminated coating; laminate will slightly increase the service life of the feeder. Although, as written above, you can use wide tape for these purposes. The advantage of this design is that there is already a bottom, walls and roof of the future feeder, which needs to be slightly modified by cutting holes in a square or rectangular shape on the sides.

Even a schoolchild can make a cozy feeder from a mailbox with his own hands
You will need a nylon cord, scissors or a stationery knife and tape. Since cardboard is a very short-lived material and is afraid of moisture, a finished feeder wrapped with tape will last until the next season. Having cut the side holes and secured the cord, you can hang the feeder and fill it with treats for the birds, which will not keep you waiting long. Place sand or some pebbles at the bottom so that the structure does not sway too much in the wind.

If you cover a cardboard feeder with paints, it will last longer.
You can do it a little differently. We glue the lid of the box perpendicularly so that the lid serves as a stern stand, and the second part of the box serves as a side and a roof. We glue the structure with tape. We make two hooks from wire: we bend a piece of wire in half and pierce the “ceiling” of the feeder with the ends, twist it and bend it from the inside. By connecting the hooks, you can hang the feeder on a branch. As you can see in the photo. Now pour in the food and wait for the guests.
Window bird feeder (with suction cups)
Such feeders are a very interesting option for general development children, and adults too :). The feeder is attached to the window, or rather to the glass, using suction cups. Usually such feeders are also made transparent so that to the fullest enjoy watching birds. If you have suction cups, you can make such a feeder yourself, for example, from the same plastic bottle, but you must agree that it will still not be as aesthetically pleasing as the ready-made version from the store. Children will probably start taking pictures of all this, and photos with yellowed, cloudy bottles will, to put it mildly, not be so hot. The purchased options look very nice.


A feeder is not only a great way to feed our bird friends. If you approach the issue of making it creatively, you can create a real garden decoration. We offer a selection of ideas that will tell you how to make a bird feeder with your own hands. And master classes from the editors of HomeMyHome.ru will help you learn the intricacies of manufacturing and reveal the secrets of constructing drawings.
Depending on what goals you pursue when making a feeder, the following types of its design differ.
- Tray. The simplest type of feeder. The elementary design involves a small pallet with sides, secured to a tree with a strong thread or fishing line;


Making such a “bowl” is not difficult, especially if you have an ordinary cardboard box and a clothesline on hand. One of the disadvantages is that in strong winds, such structures tip over, and all the food ends up on the ground.
- Platforms with dispenser– an improved model of the previous type of feeder. It consists of a tray where the birds will feed, and a sealed container with a mechanism for gradually supplying food as it decreases. As a rule, the dispenser is made from an ordinary plastic bottle, attached to the tray with the hole down at a short distance so that the food pours out on its own. Of course, such feeders are more difficult to make, but the end result is a high-quality, convenient and durable design.
- Houses − the most common feeders of all species diversity. In addition, if you approach the creation issue creatively, you can make a real shelter for birds and an original garden decoration for yourself.

- Hopper feeders somewhat similar to birdhouses. They are completely enclosed structures with “windows” for birds. If you take some precautions, birds will even be able to hide in them from bad weather, and not just have a snack.
1 of 6


Inspired by ideas for creating simple feeders? If yes, then our small master classes are for you.
Related article:
How to make a birdhouse yourself, how to decorate it and install it correctly, photo examples of creative houses - read in our publication.
How to make feeders for street birds with your own hands - description and drawings
As we have already seen, feeders can be made from completely different materials - literally, everything that is at hand. It's a little more difficult to work with wood. But nothing is impossible, the main thing is that there is a desire. Let's consider different options execution of bird feeders.
Interesting DIY bird feeder made of wood
We offer step-by-step instructions on how to make a beautiful bird feeder house yourself, as in the photo below.

The main material is small logs that can be cut from ordinary cuttings for a shovel or rake. Fast, cheap and original. All other parts are also made of wood. To bring such a masterpiece to life, in addition to raw materials, you will need a special drilling machine woodworking and jigsaw. It will be possible to do it without them, but it’s not a fact that it will turn out just as neatly and beautifully.
| Illustration | Description |
 | We cut logs 30 cm long from the cuttings. You should get 36 pieces in total. 24 pieces - for the walls, and parts from the logs for the pediment. Remains are spare parts in case of damage to the main elements. |
 | We are preparing a machine with a wood crown of a suitable diameter to make recesses in the logs that will serve as fastenings for the future feeder. |
 | To ensure that the parts are similar and that the fastening recesses fit each other perfectly, it is best to make paired holes. To do this, we fasten the two blanks together with tape on both sides for better fixation and measure 3 cm from both ends. |
 | We make holes on the machine in the logs secured to each other at both ends. |
 | To assemble the house you will also need round wooden sticks. Sushi chopsticks are ideal, but not flat, but round. In accordance with their diameter, we make a hole in each recess of the log. And we begin to assemble the walls of the house. |
 | When you are finished with the construction, make sure that all the walls are even and glue the logs together. |
 | We cut out a template for the future roof from plywood. The size and slope depend on the design of the resulting house frame. |
 | Using the template, we cut the logs obliquely on both sides. We make a hole in the middle for the stick and glue the resulting structure. On the front side, if desired, we make a hole in the “attic”. Also, to give the structure rigidity, we put in a transverse beam and glue it. |
 | The roof can be made from any available sheet material. In our case, we used moisture-resistant plywood. Small parts were cut out to fit the resulting house. |
 | Let's start decorating the house - doors, canopy, attic. All this is done by hand from leftover plywood. In handicraft stores you can purchase various decorative items, such as a door lock. In our case, the door is simply glued to the wall. |
 | We make a pallet for the house from ordinary boards. |
 | It is best not to twist them together, but to glue them together, as shown in the photo. |
 | We paint the house, make sides on the pallet so that the food does not spill out, and you can hang the resulting birdhouse-feeder in the garden. |
If you have any questions, you can find answers to them in the video provided.
DIY bird feeder made of plywood
To make a feeder from plywood, you will need to work with it special tools, such as a jigsaw, a screwdriver, wood glue, self-tapping screws, a tape measure, a pencil, a construction corner and glue. We will make a bunker-type feeder not large size, approximately as in the drawing below. They simplified it a little by placing only two walls, which will be held together to form a triangle shape.

All work takes place in several stages. Use a jigsaw to cut out the necessary parts. Their sizes and shapes are shown in the photo below.

We attach small blocks along the edges of the bottom so that their total height is approximately 5-7 cm.
Attention! On a side 27 cm long we install the blocks so that there are small indentations along the edges - no more than 7 mm.

To the side where the indents are made, we mount side walls. To make the entire structure stable, we reinforce it along the connection of the side parts with a block.


Treat the resulting feeder with impregnation so that the plywood does not deteriorate as long as possible under the influence of precipitation and temperature changes.
How to make a feeder out of a box - quickly and easily
Bird feeder made of cardboard box– an option for those who want to do everything as quickly and simply as possible.


All that remains is to choose a stronger box, cut a hole in it for the birds, work out the mounting method - and the design is ready. It's a pity that it will lose its shape very quickly. But this is a fixable matter and costs practically nothing.
Master class on how to make a feeder from a plastic bottle
Plastic bottles are one of the most common recycled materials, suitable for making all sorts of useful things with your own hands. Feeders are also no exception. We offer step by step instructions making a cute and durable feeder. For this you will need:
- plastic bottles of 1.5 and 2 liters;
- scissors;
- lighter;
- spray paints;
- glue gun;
- glue "Moment";
- wire.

| Illustration | Description |
 | We cut out the bottoms of three two-liter bottles. To make it look more interesting, you can cut out the edges with petals and burn them with a lighter, getting a wavy edge. |
 | We make a hole in the middle of the bottoms and string them on a wire. |
 | We cut off the top of a one and a half liter bottle and, like the bottoms, we process the edges with a lighter. |
 | We string the neck onto a wire and paint the resulting structure with paint. |
 | Use a swab to paint the edges with a contrasting color. |
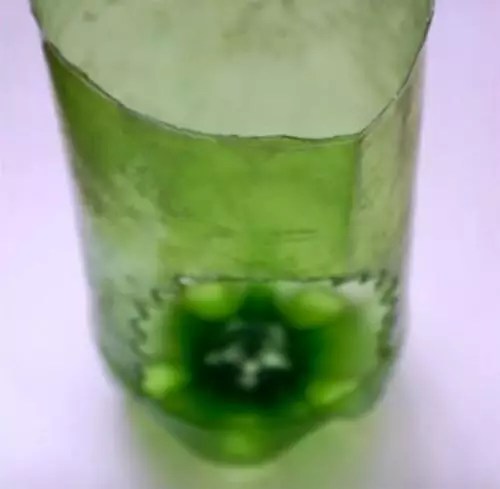 | Cut it out bottom part for a one and a half liter bottle, cut a hole and also singe it with a lighter. |
 | We connect the lower and upper parts with a glue gun. |
 | We cut out the weed from the remains of the bottles. And use a glue gun to attach them to the bottom. |
The bird feeder is ready. We pour more food there and watch the growth of the bird population in your garden.
Bird feeders: photos, interesting ideas. The text contains unusual and original solutions, which will allow you to create a comfortable and beautiful area for feeding birds in the garden or near the house.
Wood is the most common material for making feeders
Bird feeder: what should be the design?
If they want to improve the area near their house, many owners of summer cottages lay paved paths, lay out flower beds and flower beds, install benches and lanterns. All this creates comfort and coziness for the residents of the house. However, we should not forget about the small inhabitants of the garden, for whom, with the arrival of winter, it becomes more difficult to obtain food for themselves.

Creative feeder made from a saucer and cup
Making a bird feeder with your own hands will not only help birds overcome this difficult period, but will also add a certain charm to the garden. Using simple technologies, you can show your own imagination and create original house for feeding.
Advantages of homemade feeders:
- the opportunity to take care of birds that find it difficult to obtain their own food;
- decorative decoration of the yard;
- an opportunity to instill in children a love of the environment and birds.

You can easily make a wire fruit feeder with your own hands
Moreover, such a decision can be implemented not only by owners of private and country houses, but also residents of city apartments.
Is it profitable to buy a ready-made bird feeder: advantages and disadvantages
If you want to install a standard feeder in the yard, made on professional level, you can order the product from specialists. Experienced craftsmen will independently select high-quality materials and make the structure using special technologies.

Finished plastic bird feeder
Buyers are invited to choose a bird feeder with a design they like based on the picture. Such structures can have any size and shape. By purchasing a custom-made feeder, the consumer can be completely sure that it will meet his wishes and fit perfectly into the exterior of the yard.
Purchasing finished products comes with both advantages and disadvantages. The negative aspects of this include high cost professionally made feeders. In addition, the buyer deprives himself of the joys of the creative process and waiting for the birds to arrive. Therefore, many people prefer to create their own houses for feeding birds in their yard or by the window.

Hopper type feeder for feeding two birds at the same time
Pay attention! The design of the feeder must be reliable, so it is advisable to select practical and durable materials for its construction that will protect the birds from precipitation and wind.
What requirements must a homemade bird feeder meet?
When choosing a specific design for a homemade feeder, you need to take into account not only the type of birds for which the design will be made, but also other nuances. Birds mainly rely on their vision, so the poured food should be visible to them from afar.

Original feeders using wine bottles
The design of the structure must be such that the grain is not covered with snow or blown by the wind. High sides and a roof will help to cope with this problem. It is unacceptable for moisture to get on the feed. Otherwise, the grains will become moldy and spoiled. It is desirable that there is protection from chipmunks and squirrels. In this case, the birds should not experience any difficulties when removing food.
Drawings of bird feeders, of which there are many on the Internet, can be successfully used as a visual aid for creating a beautiful design. First of all, you should pay attention to practical and convenient options. The food should not spill onto the ground, otherwise it will attract small predators such as stoats, weasels, and ferrets. Their presence poses a direct threat to birds.

Bird feeder is made in the form of a mesh flower
If the structure will be used for temporary feeding in winter time, it's better to hang it up. Thus, the feeder will attract less sparrows, which find food much easier than other birds. Stationary structures are used for constant feeding. In this case, protection from predators is mandatory. It is desirable that the grain is located on a level area of sufficiently large size that maintains good stability.
Types of bird feeders: photos and descriptions of designs
The design of homemade feeders is practically unlimited. The main thing is that the design meets the basic requirements of practicality, reliability and safety.

Waffle cups were used to create grain hangers
Classification of bird feeders by type of design:
- suspension;
- platform;
- house;
- bunker;
- tray;
- peeler
Each of these designs has its own characteristics and is designed for certain types of birds.

The bird feeder can be cast from plaster or clay
Original bird feeders: photos of hanging structures
The designs of the suspensions are very simple. In this case, the food is suspended in a mesh case or on a thread. They are used primarily as tit feeders. Although other species of insectivorous birds, with the exception of woodpeckers, can also use dewlaps.
The most common version of “antifreeze” feeding is a piece of lard without spices and salt. There are more nutritional mixtures, which are designed for shelling birds. A ball made of seeds is suitable for them. Peanut oil or lard (gutter fat) is used as a binding component.

Beautiful examples of hanging bird feeders
Pay attention! You should not cast feed mass in beautiful shape or plastic cup and then freeze. The ball is more comfortable for birds. This makes it much easier for them to cling on and they don’t have to expend a lot of energy to keep themselves afloat while feeding.
It is most convenient to form a ball consisting of feed mass with your hands. This must be done in the cold. The fat will harden very quickly, so after forming a ball, you need to hang it up immediately.
Hanging bird feeder crafts can be made with specific types of birds in mind. Great tits prefer garlands made of dried berries. They especially like rose hips. Peanuts in pods are allowed.

Original wicker basket with nuts for birds
The best option for blue tits would be swing feeders. In this case, it is advisable to hang the balls on elastic and thin branches so that they balance.
The beautiful do-it-yourself bird feeders, made in the form of mobiles or movable sculptures, look original in the photo. Such designs can even attract great tits, which will not conflict with blue tits.

You can use a regular plate secured with chains as a feeder.
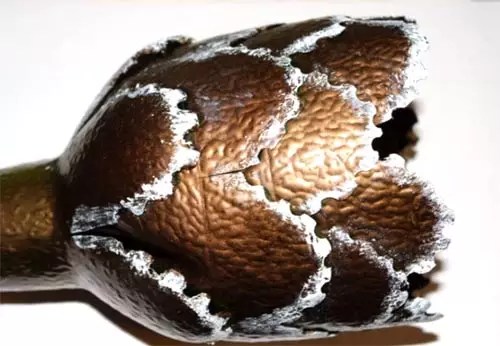
Hanging options made from cones are suitable for attracting bullfinches, shelling birds and waxwings. To make the feeder visible from afar, you can hang a bright bunch of rowan or viburnum on it. It is advisable to use a fertile cone for this. If this is not possible, any with ruffled scales will do. It needs to be doused with peanut butter. After this, food is placed between the scales and the cone can be hung. Even crossbills may like such cones.
You cannot use paper to create such structures, but you can make a beautiful bird feeder with your own hands from a thick base from a toilet paper roll. It is advisable to attach bright pieces of fabric or paper from below that will attract the attention of birds.

Creative coconut shell feeder
Convenient bird feeders: photos of tray structures and platforms
Platform feeders are a flat surface on which food is placed. The advantage of such designs is that birds can see the presence of food from afar. However, there are some disadvantages to a DIY flat wooden bird feeder. Firstly, there are no fences to provide protection from the wind. As a result, the feed in large quantities swells and wakes up down. Secondly, nothing prevents sparrows from actively using these feeders.
The fact is that sparrows live in flocks. These nosy birds, unlike pigeons and crows, can freely penetrate small feeders and empty them, not giving a chance to other birds, for whom it is much more difficult to obtain food in winter. To eliminate this possibility, it is advisable to avoid the use of open structures.

An easy way to make a bird canteen is to use a wicker basket.
Sparrows are very careful. In case of danger, they take off straight from their place steeply. That's why the best option There will be a birdhouse made of cardboard or wood with a steep roof that has more overhang. It is desirable that the structure have low windows to provide birds with access to food. In this case, the sparrows will first have to flutter to the side before flying away, so such feeders are unattractive to them.
Useful advice! In winter, birds could use a vitamin supplement. To do this, you can put in the feeder cores of pears and apples with seeds, viburnum berries, elderberries, rowan berries, the fibrous part of a pumpkin with seeds, dried rose hips, grape seeds. You can use cherry pits from compote.

Feeder-platform made of wood on a long leg
For those birds that constantly live on the site, a home-made original tray-type bird feeder is suitable. In front of the tray (window that provides access to food), you can install a perch or landing pad.
There are two types of tray feeders:
- With free access to the mixture.
- With automatic feeding of food into the tray.

The bird tray can accommodate grain and fruit food
A window bird feeder with automatic feeding is much more practical than bunker structures. In this case, the food practically does not wake up. Trough structures are designed specifically for one type of bird. It is possible to use a feeder for several species of birds. However, creating such a structure will require not only appropriate skills and tools, but also ornithological knowledge.
Feeding houses: photos of birdhouses and similar structures
Feeders in the form of houses protect food well from snow. By equipping the structure with a roof, you can protect the inside from the wind and sparrows. But beautiful feeder for birds in the form of a house does not provide protection against food spillage. Therefore, only those birds that are accustomed to feeding will be present on the site. For forest birds, this option is very inconvenient, because they are drawn to human habitation only in cases of crisis and may simply not notice grains that have spilled onto the ground.

Simple wooden feeder house
A structure in the form of a house with a sloping roof can be made from a box. If possible, it is advisable to treat such a cardboard feeder with a diluted adhesive composition. For this purpose, PVA is suitable, which is mixed with water in a ratio of 1:3 or 1:5. The supports are made of sticks, which are also attached with glue. If everything is done correctly, such a feeder will last for several seasons. The structure is nailed to the tree.
A beautiful feeder with a pitched roof will be the best option for strong, large birds. These include nutcrackers, waxwings, jays and pigeons. All of them can sit quietly in a row during feeding, so it is better to equip the dining room with a long perch.

The dining house is complemented by a hanging bag of treats
Wood or very thick pre-treated cardboard can be used as a manufacturing material. The design for large birds should be much larger than for ordinary birds. In this case, you need to select bird feeder drawings with dimensions that will suit them.
Pay attention! A shoebox bird feeder is not suitable for feeding large birds. The cardboard in such designs is very thin. Strong birds will very quickly break the feeder while feeding.

Bright elements on the feeder will attract the attention of birds
Practical feeders: photos of bunker structures and shellers
Bunker-type structures are the best option if an anti-sparrow feeder is required. In this case, the feeding area is limited in size, so the entire flock cannot accommodate. The sparrows will have no choice but to eat alternately with the company of other birds.
Unusual bunker-type bird feeders can have different designs. It is advisable that a product designed for small spotted woodpeckers and tits be equipped with a hard, narrow platform. Anti-sparrow versions are much wider and have a roof. Modern materials make it possible to create a bunker structure in just 5 minutes.

To make a feeder, you can use glass vessels - vases, small aquariums, flower pots
To make your own bottle feeder you will need a minimum set of tools and materials:
- nylon thread;
- bottle (PET);
- superglue;
- plastic plate;
- large needle;
- knife and scissors.
Plastic is a very practical and durable material that is not afraid of moisture and frost. This feeder will last for several seasons.

Hopper type feeder can hold a large supply of bird food
Shelling feeders are less popular. They are designed for a specific type of bird. IN in this case the feed is retained using a special metal mesh. The design can be improved by making it combined. For this purpose, the peeling feeder is combined with the tray version. Thanks to this, birds of different species can coexist in one area.
How to make bird feeders: choosing materials for work
Having decided on the type of future design, you need to decide what the feeder will be made of. For these purposes, you can use a variety of materials. Everyone has many of them in their home, so you can not only create original feeder for birds with your own hands, but also do it at minimal cost.

To make a feeder from a coffee set, you need to glue the cup to the saucer and secure the structure to the handle
The following materials are usually used to make poultry canteen:
- plastic;
- paper and cardboard;
- wood;
- plywood;
- improvised materials (bottles, boxes, milk or juice bags, etc.).
Each of the listed materials is suitable for creating certain types of structures and has both advantages and disadvantages.

Simple feeders can be made from cardboard cups
Features of bird feeders made from plastic bottles and trays
Plastic feeders are the most popular option. This material has many advantages.
Advantages of feeders made of plastic bottles and trays:
- Availability of material.
- The transparent walls of the structure make the food visible from afar.
- Ease of processing.
- Minimum amount of garbage and waste.
- There is no need to use special tools.
- High strength and durability.

An affordable and simple way to build a feeder is to use a plastic bottle
Important! The roof of a plastic feeder in the form of a house should be opaque or at least matte. In case of danger, birds may not notice the transparent plane above and hit it.
A good way to create a small, visible bird feeder from scrap materials is to use old children's toys, such as blocks. They are made of polyethylene, so it is advisable to use superglue for fixation. Such designs have bright and rich colors, so it will be easy for birds to find food. Polyethylene is easy to process. To cut round holes in the walls, you can use a compass with two needles. Polyethylene is a slippery material, so it is advisable to equip the feeder with a perch.

Bird canteen made from a plastic bottle and a wooden spoon
As a plastic building material, you can use scraps of transparent polycarbonate that may have remained after renovations in the house. This feeder can be mounted on a window using suction cups from bathroom shelves.
Bird feeders made from bottles and other unsuitable containers deserve special attention. The main thing is that the design is well thought out. To ensure visibility of the feed, it is advisable to use a wide tray. The presence of a perch will make feeding birds more convenient. If you take a large tray and a capacious container, you will not have to frequently replenish food supplies. As a result, the birds will be less timid.

The design of the feeder is made of a plate and a bottle
To make a bird feeder with your own hands from a plastic bottle, it is advisable to use a trough-shaped tray. In this case, spillage of feed will be insignificant. If you bend up the lid of the hatch that provides access to the food, the feeder will turn out to be anti-passerine. In this case, the plane that is formed at the top can be used to place vitamin supplements.
Features of making homemade feeders from a box
- milk;
- kefir;
- juice, etc.

A simple and original bird feeder made from juice tetra pack
Despite the fact that these bags are made of cardboard, their walls are covered with film on both sides. Therefore, laminated feeders can withstand one winter.
Small bags left over from juice or milk are ideal as feeders for the following types of birds:
- goldfinches;
- tits;
- granivores.

Feeding houses made from cardboard milk bags
In this case, you must install a perch stick to make it easier for the birds to get food.
Useful advice! To attract the Great Spotted Woodpecker to the tit feeder, just attach a wooden circle to the bottom of the valve. This will make it easier for the bird to attach itself to the structure.

Feeders made from juice boxes
Large bags can be used to make universal bird feeders. To do this, you need to cut a large opening so that the food can be seen from afar. If the feeder is hanging, it needs to be pierced with a perch. The structure from the package can be placed in a bush. In this case, a perch will not be required; its function will be performed by the branches.
Eco-friendly wooden bird feeders
The advantage of wooden feeders is their durability. Most often, such structures are stationary.

Wooden feeder-dining room, made in a modern design
As a protective treatment you can use:
- drying oil;
- water-polymer composition;
- mixture in the form of diluted PVA glue.
To build a bird feeder out of wood with your own hands, you will definitely need carpentry tools and skills in handling them. Traditional models look like a house. It is not recommended to put a flat roof on the feeder, as this will expose the food to weathering.

Bird feeder made of logs
Standard house-shaped designs can be improved and specialized for a specific type of bird through minor changes. For example, a feeder with a gable roof without railings can be used as a public option. If you build a small sheathing around the perimeter, such a dining room will appeal to shelling birds. It quite realistically imitates natural feeding conditions. A similar model with a continuous low fence will achieve an anti-sparrow effect and protect food from the wind.
A design in which the roof has low slopes will also provide protection against swelling of the feed. Such a feeder will be used by sparrows only as a last resort.

Original swing feeders for birds
An alternative to a suspended wood structure would be a DIY bird feeder made of plywood. To create it, you will also need wooden blocks with a section size of 3x3 or 3x4 cm. To avoid the use of lumber, you can make bars from strips of plywood by gluing. However, for stationary feeders on poles, it is preferable to use solid wood, since plywood street conditions After a few seasons it will delaminate, regardless of the quality of the protective impregnation.
Useful advice! If you use waterproof birch sheets to build a bird feeder from plywood, you can get a reliable and durable structure. This material perfectly withstands outdoor conditions.

Birdhouse made from cork plugs
Bird feeders made from scrap materials
Unusual and original designs can be made from scrap materials, the creation of which can focus on design or functional features.
An ear of corn can be used as a feeder. To do this, a nail is passed through it. This version of a bird feeder made from scrap materials can simply be hung or made part of a stationary structure. Corn should be firm, preferably oilseed or fodder varieties. The smaller the grains, the better.

Simple Egg Tray Bird Feeder Design
It is better to avoid using table sugar cobs, as they are harmful to birds. Their grains contain large number sugar and starch. The corn feeder is designed for large frugivorous and granivorous birds, as well as shellers.
You can use popsicle sticks as a building material to create a wooden bird feeder. During the summer season they can be accumulated in sufficient quantity. To make such a structure you will need string and PVA glue. You can install a pole of larger popsicle sticks on each side of the feeder. Thanks to this, the dining room can be used by 4 birds at the same time, for example, chickadees or siskins.

Original feeder-holder for food from a kitchen whisk
An excellent option would be a wicker basket-shaped feeder with a hanging lid. To create it you will need paper tubes, which can be made from old newspapers. The weaving technology is quite complex and labor-intensive, so not everyone will decide to take on the construction of such a feeder, but the result exceeds all expectations. To prevent paper straws from becoming soggy, they need to be treated with a protective compound (glue and stain).
A large metal tin can is also suitable for constructing a feeder. It is suspended on a rope in a horizontal position. To prevent food from spilling onto the ground, you need to install a small damper. Suitable for this upper part lids, bent in half. You definitely need to install a perch.

The bird's dining room is made from a small tin can
Important! Regardless of the type of design, the feeder must be safe. Wooden models need to be thoroughly sanded and rounded sharp corners. Metal options can be wrapped with twine, which sits on the glue.
Feeders hung on the site of a private house are not only support for birds in the cold winter, but also a beautiful decoration of the yard. Of course, when you hear the word feeder, your memory brings to mind a nondescript wooden structure, completely different from a decorative element. However, you can make an original feeder that is both comfortable for birds and pleasing to the eyes.
- The structure must perform its functions, and not just hang on a branch. Therefore, when creating it, you need to take into account several important nuances.
- Consider what birds live in your area.
- The structure must be suitable for the size of the animal. An excessively small feeder is inconvenient, but an excessively large one has its disadvantages. Other species of birds can take food from a large tit feeder.
- The food must be suitable.
- Place inside those types of food that are suitable for the birds that come to your garden. The food should be easy to get out; if the grains are large, the holes must be made large enough.
- When decorating the product, you should not use too bright colors.
- These animals see many more colors than humans. If the design is of overly saturated shades, the bird may avoid it, since it does not look like natural shades. It is better if its color imitates the plants that are usually seen on your site.
- The roof and sides are important for food safety.
- If snow and rain fall on it, mold may form that is dangerous to the health of the birds.
- The material of the product must be strong and moisture resistant.
- The better the material is selected, the longer the feeder will please the owners of the site and their feathered guests.
- For the safety of your little children, you should not leave sharp edges on the structure.
- The product should hang high so that birds do not become prey for cats.


Easy ways to make a feeder
Below are several options on how to easily make a bird feeder.
Coconut feeder
- This option is suitable for small animals.
- The contents are pulled out of the coconut, leaving only the shell.
- Make one or more holes in the sides of the shell.
- Attach a rope with which the structure will be attached to the branch.
- Add grain and the feeder is ready.

Mesh feeder for fruits
Supermarkets often sell tangerines or apples in nets. This item will be useful for creating a feeder. Difficulties arise with placing food in it. Regular grains fall out of the mesh easily.

It is better to place peanuts or peeled ones in such a mesh feeder. walnuts. It is advisable to place a roof made of a piece of plywood, board or plastic over the mesh.


Plastic construction
A bird feeder made from a plastic bottle is very easy to make. You just need to cut holes in the bottle and attach it to a branch, tying a wire to the neck. Using the same method, you can make a feeder from a cardboard juice or milk bag.


Wooden product
Small wooden sticks and boards are glued to each other with waterproof glue. The structure should have a bottom, sides at the edges, a roof and 4 vertical sticks holding the top and bottom together.

Vertical fastenings can be replaced with strong ropes. If you can’t fasten with glue, small screws or nails will do.

More complex designs
The ideas for decorative bird feeders are not much different from the simple options described above. Any of the listed methods is taken as a basis and decorated with elements suitable for accessories in the garden.

You can cut out and decorate elegant elements in the form of flowers or abstract decorations from plastic. Additional perches will look nice in a large wooden feeder.

To add functionality, you can attach a container with a small hole inside the structure. When the food runs out, the next portion of treats will pour out from the reserves.


Photos of bird feeders and visual instructions on how to improve them can inspire you to come up with some interesting ideas. There are many drawings on the Internet that indicate down to the centimeter the exact parameters for creating products with your own hands. For a creative person they will help you make a unique and useful decoration for your yard.


Photos of bird feeders


