DIY ideas for a swimming pool at your dacha. How to make a pool with your own hands: step-by-step construction instructions
Comfortable living of residents in an apartment building is ensured in different ways. One of them is lighting in the entrance. Although many residents continue to use incandescent lamps, alternative lighting sources are growing in popularity as they are more economical, durable and have a low incandescent level.
High-quality lighting in the entrance is a necessary condition for a safe and comfortable stay for residents.
Entrance lighting can be arranged in an economical way. Innovative bulbs provide soft light that is at the same time more intense and less expensive. This is not done on your own. You need to contact management company, which is obliged to react if the lighting does not meet the established requirements.
Currently, many entrances have an automatic system installed. Thanks to this, it significantly reduces electricity costs. This also complies with the requirements established in legislation.

Sample application for modernization of lighting in the entrance.
Each entrance of the apartment building in mandatory equipped with lighting fixtures. Regulatory documents indicate what the illumination should be (in lux). The rules do not provide categorical instructions on certain lighting devices.
However, there is an indication that lamps should be economical, with greater light output and service life.
Both luminescent and led lamps, including LED strips.
Lighting standards for various parts of the entrance and utility rooms
Lighting in the entrances of different premises has its own standards and rules (GOSTs, construction SNiP). The main ones include the following:
- standardization is carried out according to table VSN 59-88, which contains two types of standards: light from incandescent or fluorescent lamps;
- in elevators, lamps have an illumination power of 20 lux (for fluorescent lamps) and 7 lux (for incandescent lamps);
- wheelchair spaces are illuminated with incandescent light bulbs;
- elevator shafts - 5 lux incandescent light bulbs;
- Basements and attics, as well as electrical rooms, garbage collection rooms and others, are illuminated with 10 lux incandescent light bulbs.

Incandescent lamps are gradually becoming a thing of the past. And the leading positions are increasingly occupied by LED devices, as the most economical and durable.
Standards for controlling entrance lighting
Automation undergoes regular modernization. Regulatory documentation does not always have time to change in connection with emerging technologies. Therefore, lighting standards in the entrances of residential buildings are often advisory in nature. IN in this case you need to remember the following points:
- the automatic system must be turned on and off manually;
- when installing a system that responds automatically, the light must turn on with to varying degrees illumination;
- if sensors are used, then emergency lighting is provided, switched on in the staircases automatically and manually;
- The devices that illuminate the attic are located outside this room.
Who pays for lighting in hallways, and how is the amount determined?
Lighting in hallways is a general household need. If previously the consumption of electricity for general household needs was indicated separately in the receipt, then from the beginning of 2017 this item was removed. Currently, the calculation is performed depending on the presence or absence of a common building meter.
If a common house meter is installed, then the indicators are determined by employees of the supervisory authority together with representatives of the house. After this, the difference between the received amount and the metering values in each apartment is calculated.
Quantity also matters square meters, not equipped with sensors. The result is distributed among homeowners depending on the area of the room. The more square meters in the apartment, the more you will have to pay for electrical energy according to the ODN.
If there is no meter, then payment is made in accordance with current regulations established in the region.

Motion sensor in the entrance - reacts to the movement of objects in its “area of responsibility”.
Who replaces lighting in hallways?
If there is no light in the entrance, then the reason can be determined independently. It could be as follows:
- light bulb burnout;
- lamp malfunction;
- short circuit;
- damage to switches;
- breakdown of the distribution board;
- accident;
- planned work.
After determining the cause of the breakdown, the management company or homeowners association is reported. These organizations are responsible for providing light in the entrances apartment building(the obligation does not apply to balconies, the lighting of which is decided by homeowners).
Expert opinion
Mironova Anna Sergeevna
Generalist lawyer. Specializes in family issues, civil, criminal and housing law
Replacement of light bulbs is the responsibility of the management company. Troubleshooting and replacement are performed based on the results scheduled inspections. They are carried out according to a set schedule.
Where to go if there is no lighting in the entrances
Residents can call or come to the management office and submit a corresponding application. The management company’s specialists must carry out the necessary work the very next day after the application. In case of delay, residents have the right to contact the housing inspectorate or the prosecutor's office. IN in some cases the period during which the work is carried out can be extended to 7 days.
What are the possible consequences for the management company if there is no lighting in the entrances?
Lighting in the entrance is very important, because in addition to its direct purpose, it provides the safety of residents and protection against theft. Therefore, authorized organizations are required to promptly respond to these applications.
If after 7 days after filing the application the problem is not resolved, the management company may be held legally liable under the Code of Administrative Offenses. In accordance with Article 7.22 of the Code on officials a fine of 4 to 5 thousand rubles is imposed. And the fine legal entities amounts from 40 to 50 thousand rubles.

Art. 7.22 Code of Administrative Offenses of the Russian Federation. Violation of the rules for the maintenance and repair of residential buildings and (or) residential premises.
Rights and legitimate interests citizens are controlled by the state housing inspection. Specialists of this organization and administration have the right to draw up protocols if relevant violations are identified.
Automation schemes for entrance lighting
Lighting in entrances apartment buildings carried out in different ways. Each scheme has its own characteristics. They can combine each other or have similar characteristics. Below are the options that are most common.
Lighting control using push-button stations
The method is more suitable for low-rise buildings, whose residents have a conscientious attitude. With its help it is possible to save money, but this depends only on the residents. The main advantage of this method is its affordable price.
Management is carried out in two ways.
The first one is a push-button post located in the entrance hall and on each floor.
The second one makes it possible to turn the light on and off only at the staircase opening. Basements and attics have external lighting in the form of a standard switch or a special sensor.
If apartment owners do not show awareness in general house issues, then the lights can be turned off using a timer.
Using Light Sensors
If there is good natural light, using a system with light sensors is a suitable option. This is not the most economical option, but is used as an alternative to a standard switch.
The sensor is installed in a dark place. The device works when it gets dark. In this case, the lighting can be turned on in the entrance or outside the room. In utility rooms, it is advisable to use standard switches.
Using motion sensors
This scheme arose not so long ago, but its popularity is growing every year. When using motion sensors, savings are achieved. Moreover, no attention is required from the residents.
In this case, sensors are installed on each floor, but sometimes - one at the entrance to the entrance. After the device is triggered, the time until shutdown is counted. If there is an elevator, the lights are turned on differently. Most often, the sensor is triggered when leaving the elevator. It is better to equip the utility rooms of the entrance with standard switches.
Combined lighting schemes
Often combined lighting schemes are used in entrances. At the same time, they are guided by the type of room and the tasks assigned. For example, the main starter is a light sensor that activates in low light and sends a signal to motion sensors mounted outside, in the lobby and in the elevator.
In another example, a motion sensor is used as the main one. Other rooms can be switched on using standard switches.
Lighting in the entrances of residential buildings is quite an overhead item for any community of homeowners. Therefore, the question of saving on this type of expense is raised quite often.
Some people reduce the light level by unscrewing some of the lamps, while others optimize the control circuit. We will talk about the possibilities of such optimization in our article.
Requirements for the level and method of controlling illumination of entrances
Lighting standards for various parts of the entrance and utility rooms
Before embarking on questions about the possibility of automating lighting control systems, you should understand the standards imposed by various regulations to this parameter. After all, this will allow us not only to arrange our lamps as efficiently as possible, but will also give us the opportunity to use the optimal automation system in our case.
- As you already understand, GOST entrance lighting has a different standard for different rooms. It is standardized in Table 1 VSN 59 - 88. According to this standard, two types of illumination are distinguished - illumination from fluorescent lamps and incandescent lamps. By the way, the so-called energy-efficient lamps are fluorescent.
- First of all, let's look at staircases and floor corridors. The illumination of these areas when using fluorescent lamps should be 10 lux, but if incandescent lamps are used, then the norm is 5 lux. In this case, the standardization plane is the steps and the floor of the corridor.

- GOST for lighting of entrances with elevator facilities is somewhat different. Thus, elevator halls should have an illumination of 20 lux when using fluorescent lamps and 7 lux for incandescent lamps. At the same time, according to clause 2.27 of VSN 59 - 88, the lamp must be installed in such a way that part of the luminous flux is directed towards the elevator doors. The lighting of entrance halls must meet similar requirements.
- If there are wheelchair spaces at the entrance, they should be illuminated using incandescent lamps. In this case, the standard illumination for them is 20 lux, and the normalized surface is the floor.
- Elevator shafts, if they are not made with mesh fencing, must also have lighting. For them, the norm is 5 lux and is given only for incandescent lamps. In this case, a conventional surface three meters from the lamp is taken as the standardized surface.
- GOST lighting for entrances must also correspond to such premises as a basement or attic. It is recommended to use only incandescent lamps for them. The lighting standard is 10 lux. In this case, not the entire room should be illuminated, but only the main passages. The same standards apply to waste collection chambers, electrical switchboards and other similar premises.
Pay attention! That, in addition to illumination standards for various rooms, there are standards for light pulsation, color rendering and some other parameters that the lighting of entrances must also comply with. These standards are given in SNiP II-4-79.
Standards for controlling entrance lighting
Automatic lighting in entrances is constantly being modernized. More and more complex and energy-efficient circuits are emerging, and regulatory documents do not always keep up with these changes.

So:
- First of all, it should be remembered that, according to clause 8.1 of VSN 59 - 88, with any method of lighting automation it must be possible to turn it on manually at any time of the day. This is necessary for both repair work, and for various unforeseen situations.
- When installing automation systems that respond to room illumination, timely switching on of lighting for rooms with different natural light levels must be provided. This can be achieved by turning on all the lights when the light level is reduced in the darkest place, or by installing additional light sensors.
- When using various sensors, evacuation or emergency lighting must be provided, which is turned on by a regular switch in addition to the automation. With the onset of darkness, it should be constantly on.
- According to clause 8.15 of VSN 59 - 88, switching devices for turning on the attic lighting must be located outside this room. They are usually located at the entrance. If there are several such inputs, then a switching device must be installed on each one.
- All lighting switching devices must ensure that the phase wire is broken. In this case, the presence of phase must be ensured on the secondary circuits of the lighting control system.
Automation schemes for entrance lighting
On at the moment A wide variety of automatic entrance lighting systems have been developed and implemented. Analyzing each scheme will take a lot of time, especially since they are often intertwined and combined with each other, so we will consider only the most common and, in our opinion, successful options.
After all, for each individual entrance, the most relevant will be its own lighting scheme, which takes into account the geography of the entrance, location features, number of floors of the building, the consciousness of the homeowners and many other aspects.
Lighting control using push-button stations
This method of lighting control will be successful for low-rise buildings with sufficient quantity conscious citizens. After all, it only provides an opportunity to save, and the residents of the entrance must directly implement these savings.
Its main advantage is its simplicity and price, which is significantly lower than all the options listed below.
So:
- Depending on the type of entrance this type has several controls possible options. In the first option, this is a push-button post located at the entrance to the entrance, as well as on each floor. When entering the entrance, a person presses the button to turn on the light, and the button pulls the switch to turn on the lighting of the entire entrance. When a person enters home, he presses the light off button, the starter coil is de-energized and the light goes out.
- The second option assumes the possibility of turning on the lighting of only the stairwell from the push-button station. In this case, the floor corridors are switched on from individual push-button posts and act on their own starter. This option is more economical, but somewhat more difficult and expensive to implement.
None of the regulatory legal acts of Russia contains a definition of “ local area».
At whose expense should it be done?
In accordance with the Housing Code, all costs for maintaining the common property of the house are divided between the owners in proportion to the area of their apartments, and since the adjacent territory belongs to joint property, payment for street light falls on the shoulders of the owners. Costs for street lighting are calculated using a common building meter and are included monthly in the residents' receipts.
Reference! If it is not documented that the territory around the house belongs to common property, the inclusion of such a line of expenses in the payment receipts is unlawful and can serve as the beginning of legal proceedings.
Return home to dark time day is much more pleasant and safer in the illuminated courtyard than getting to own apartment in the dark, shuddering at every rustle. The lack of light in the yard is a reason to contact the management company or administration.
For many summer residents, a swimming pool is a dream. But, as practice shows, it is quite possible to do it on your own and with small funds. Sometimes very small. But the pool at the dacha is useful for both children and adults: the water perfectly relieves fatigue and nervous tension.
Swimming pool for a summer residence: types and features
All pool designs can be divided into two large groups: stationary and temporary. Stationary structures include all structures partially or completely dug into the ground, which cannot be moved without destruction. The bowls of such pools are made of monolithic concrete, brick, and sometimes concrete blocks are used in construction. They can use a polymer liner (plastic bowl) or provide waterproofing using film or coating waterproofing materials.
Temporary pools are mainly inflatable and frame. They differ in that in the spring they are installed, and in the fall they are rolled up and hidden.
Which swimming pool is better for a summer residence? If you are not yet sure whether you need such an “attraction” on your site or not, buy the cheapest and fastest to install: an inflatable one. It holds water due to the inflated ring. The disadvantage of such a pool is that it is not very deep: 1.2 meters including the sides is its limit.
But, if you want it for children, then you can’t think of anything better, and adults can “hang” on the wall and relax after “relaxing” at the dacha. Depending on the quality and intensity of use, it can last from a couple of years to four to five.

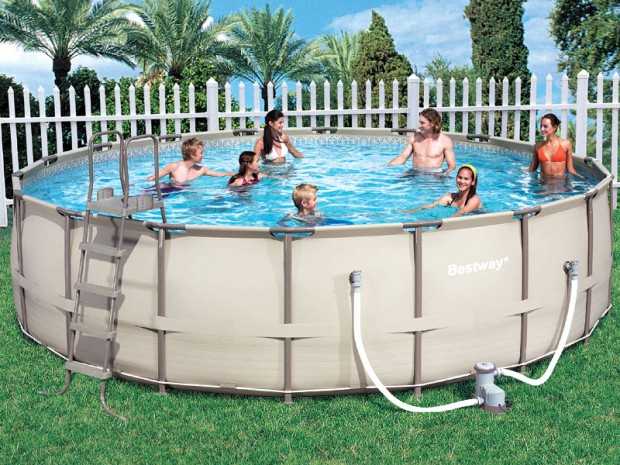
A frame pool is a little more expensive and a little more difficult to install. It already has a frame in the form of pipes, on which a special film in the form of a bowl is hung. The depth of such a pool is up to 1.8 m.
Stationary swimming pools are for those who have decided that they simply need a swimming pool at their dacha. Construction and maintenance are not cheap. First, a pit is dug, then a monolithic slab is poured, and in the second stage, the walls are erected. Measures are required to waterproof the walls outside - so that underground and melt water did not penetrate the bowl. Next comes insulation of the walls. If this is not done, heating the water will be problematic. After this, a set of measures begins to waterproof the walls inside the bowl, and then finishing work begins.
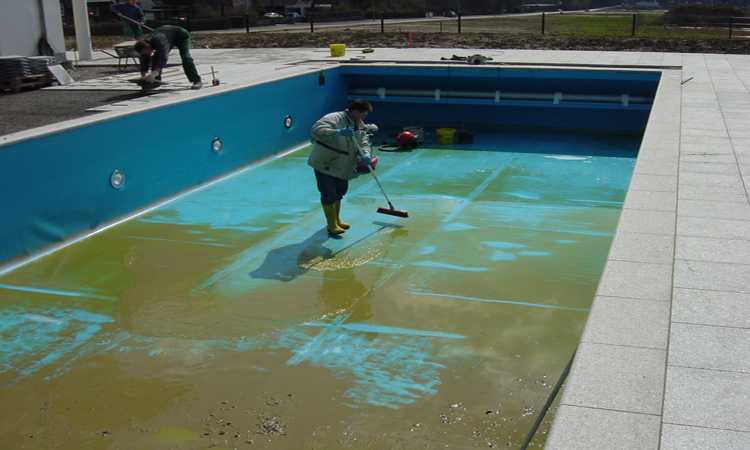
But the finished bowl is not the entire permanent pool. It is necessary to clean the water: leaves, dust and debris fall into it, bacteria and algae multiply. To bring the water into order, you need a pump, a filter system, chemical reagents, and also means for “scooping out” leaves and sediment from the bottom. Some equipment is also needed to maintain a temporary pool, but since the volumes are smaller, you can often get by with manual cleaning or water replacement, or you can use improvised means. And if there is at least 5-6 tons of water in a stationary pool (this is a small 2*3 bowl with a depth of 1.4 meters), then even such a volume is problematic to manually clean.
Installation of a frame pool at the dacha
Regardless of whether you are going to install an inflatable or frame pool, you need to prepare a site for it. These pools can be buried a little in the ground, or they can be placed on a prepared site. It doesn't matter. It is important that the surface is level and a lawn is not the best option, even if it is level. The grass under the bottom begins to decompose, and the appearance of the area after the pool is removed is very pathetic.
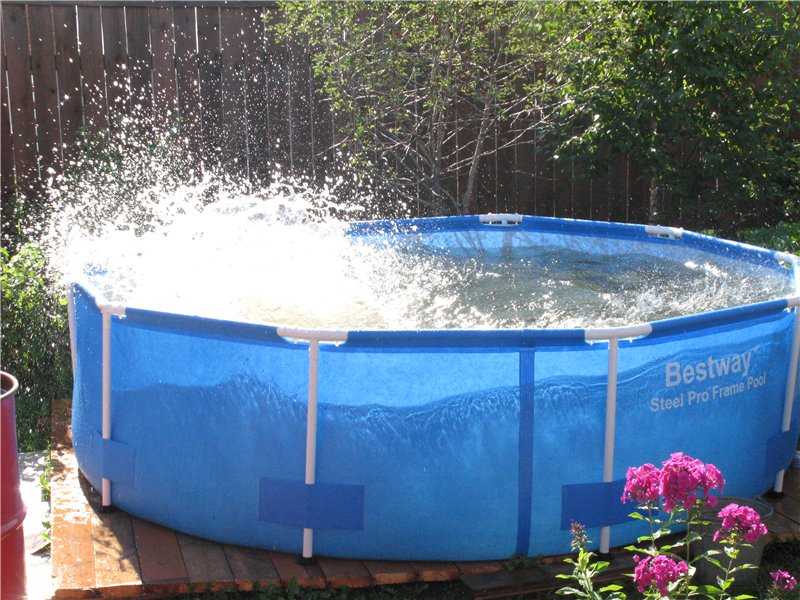
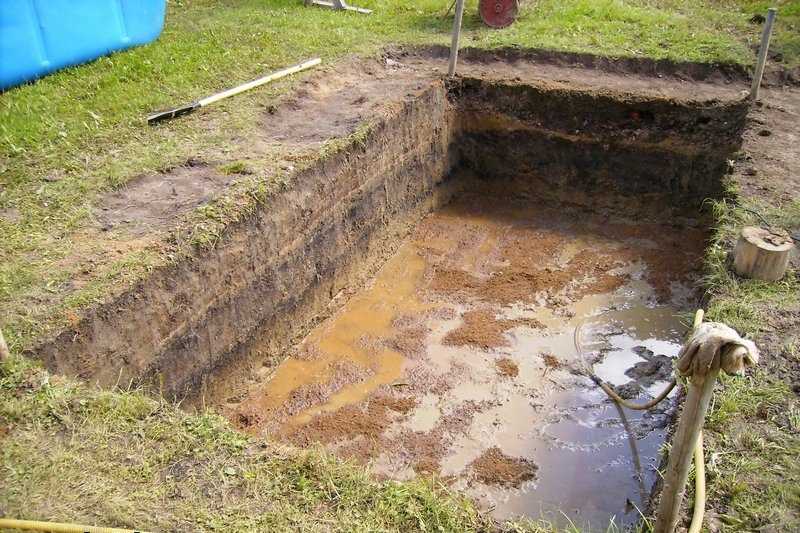
At the dacha they installed an Esprit Big swimming pool with a diameter of 450 cm and a wall height of 130 cm. It was decided to bury it almost halfway. So what did they do? We started by preparing the pit:

A frame or inflatable pool can be placed on such a base. This pool design has a metal frame wall and support posts that are attached from the outside. It is advisable to insulate the part of the walls buried in the ground. You also need insulation on the bottom: so that the water heats up faster and does not cool down.
First, lay it out in a ring at the bottom. U-profile. Then we take out the metal side, lower it into the pit (one person can’t handle it - it’s hard), unwind it, put the bottom edge into the unfolded profile, and connect it. The operation is simple, everything is clear: in the right place the sheet is connected into a ring.

Next, we take the EPS and lay it out on the bottom of the pool, cutting off the edges, trying to keep the gaps minimal. After laying out the polystyrene, the joints and edges were sprinkled with sand (according to the instructions). Why was polystyrene foam chosen rather than the much cheaper foam? The foam will be flattened under the weight of water, and the effect of such insulation will be zero. EPS can withstand heavy loads, although it is expensive.

Next, we bring the film liner inside, more or less straighten it, and temporarily attach it to the sides with tape. Next, we start swimming))) Pour a little water to the bottom - 10-15 centimeters, straighten the folds on the bottom, trying to keep everything even. Then gradually adding water. We level the film on the walls.

Note - it is better to carry out the work on a sunny, warm day, and not only because the “swimmer” is cold. In the sun, the film softens, making it easier to straighten. We worked without the sun - wrinkles remained, although this did not affect the pleasure of swimming.
After water procedures installed stiffening ribs on the outside, installing fixing strips along the upper edge of the pool. Next we started insulating the walls. In the photo above, laying of one layer began, but in general they laid two - 3 cm each. Thicker slabs are difficult to bend, but thin slabs are easy to bend. Therefore, the installation of polystyrene did not take much time.
Having installed the insulation, they began to fill the pit. Since ours is clay, we used native soil to prevent water from leaking under the walls. They poured a small layer, tamped it down, and so on until the top. One point: the bowl must be filled with water.

The instructions include a recommendation to make external supporting walls. In this case they were not made. The staircase was half buried, as it was designed to reach its full height, but here 65 cm was buried. They buried it to this depth from the outside. All that remains is the installation of equipment.
As recommended, the included filter and pump were installed. After connecting, it turned out that there was a small leak at the connection point. After partially draining the water and drying, the area is coated with sealant (neutral silicone moisture-resistant). The problem has disappeared.

Where was it dripping...
Now that's it. The swimming pool at the dacha is ready for use.

The model was chosen to be frost-resistant, so as not to put everything away for the winter. The bowl is covered with wooden shields.
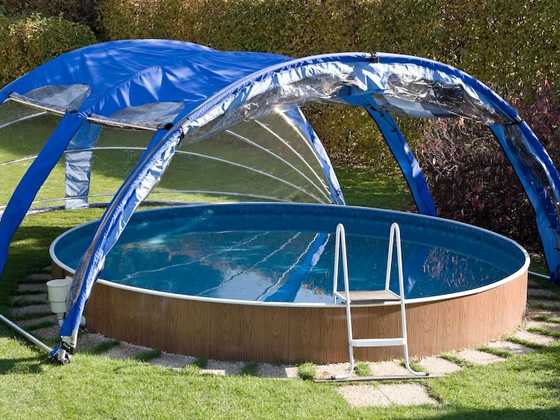
If leaving something on the site is dangerous, you can buy another design. It's just a system of stands and a film liner hung on it. A pool looks like the one in the photo below; it is never buried, but installed on top.
Although in the photo he is simply standing on the lawn, this “feat” is not worth repeating. In addition to turning the lawn into a dirty mess, the soil sucks out all the heat. The swimming season with this setup is extremely short. Moreover, even in the heat in the morning the water is cold; children can swim only from lunch. In general, it is better to make an insulated deck under the pool. Its installation does not take much time and money, but using the pool is much more convenient.
The beginning is the same as described: a pit is being dug. Its depth is about 20-25 cm. First, pour crushed stone into the pit in a layer of 10 cm, compact it well. Lay out geotestile. It will prevent sand and gravel from mixing. On top of it is sand, which is also compacted. It is already possible to install a pool on sand, but this is also not best option. sand is dragged all over the dacha, and cats also love to walk in it. Therefore, it is better to lay on top at least homemade concrete slabs, paving slabs, and sprinkle with pebbles, as in the photo.

You can also knock down a shield from wooden boards, but the boards must be sanded and treated with antibacterial impregnation. You can use WPC - wood-polymer composite. They definitely do not rot and are not afraid of water or frost. A swimming pool can be placed on such a foundation. But even in this case (except for a wooden platform), it will be difficult to warm up the water.
Insulation required. This is at least 10 cm of EPS, laid under the bottom and covered with geotextile - as a temporary option. For a permanent insulated platform, a deeper pit is required: increase the depth by 15 cm. The sequence of layers is as follows: crushed stone, geotextile, sand - 10 cm, EPS - 10 cm, geotextile, sand - 5 cm, paving slabs or stove.
Inflatable pool at the dacha
Inflatable pools are placed on the same base. Only they are installed quite simply: take the pump and start pumping up the ring. When it is filled with air, water begins to be poured inside. The ring gradually floats up, raising the edges of the pool. When the entire wall is level, the pool can be considered installed.
Plastic pool: DIY installation
The easiest way to make a stationary outdoor pool at your dacha is from a plastic or composite (fiberglass) liner: a ready-made cast bowl. This is one of the most simple ways make a stationary pool at the dacha or near the house. A pit is dug under it, into which it is installed. One of the installation options is in the photo report.

The size of the selected plastic bowl is 183*415*140 cm. The simplest shape was chosen - for easier installation. It all started with marking out the area for the foundation pit. The bowl was turned upside down, the contours were outlined, and 5 cm was added to the boards (the plan was to install it in a wooden frame). So they nailed down the pegs, pulled the twine, and started digging.

It was decided to leave part of the side outside, so the depth of the pit is 1 meter. A layer of sand about 15 cm is poured onto the bottom, everything is filled with water to compact the substrate.
While the water is draining, the sand dries up, and boards 2.5 cm thick are assembled to fit the dimensions of the pit. A 50*50 mm beam was used as a frame, and it was also placed on top of the boards. The upper edge of the plastic bowl was attached to this beam.

All boards are treated with an antiseptic for direct contact with soil. The manufacturer promises 10 years without rot...

When all the walls were assembled and secured, the bowl was inserted inside. The bottom lay tightly, the height was calculated correctly.

There should be a reinforced concrete edge around the perimeter of the pool. To tie the bowl more tightly to the concrete, corners are installed around the perimeter. They are attached to the beam and the edge of the bowl through and through, with stainless bolts and nuts.

To prevent the plastic from “walking” during operation, we grab the edges with a clamp.

The fittings are attached to the installed corners. We used 15 mm, placed 4 rods: two on top and two on bottom. Knitted with special wire.

Formwork is installed around the perimeter. First, sand was poured under the reinforcement, so external shields were installed. The inside of the boards is covered with a thick film to make it easier to remove the formwork. Mortgages were also installed: overflow pipes. They will be placed outside the pool and will protect the bowl from overflowing.

Before pouring the concrete, they began to fill the bowl with water. This is necessary so that the concrete does not crush it. At the same time, the gaps remaining between the walls of the bowl and the plank frame were filled with sand. It turns out that the bowl is fixed in better position. When it was almost filled, concrete was poured into the formwork and treated with a vibrator to increase strength and uniformity.

Four days later the formwork was removed. The side turned out to be 40 cm wide and the same height. Next, we begin to prepare the foundation for finishing the adjacent area.

Since the site is slightly sloping, soil had to be removed from one side. Sand is poured and compacted around the perimeter. Roofing material is rolled out over the leveled surface.

Another layer of sand was poured onto it, into which the paving slabs were laid. The cracks between the tiles are also filled with sand.


To prevent leaves from falling into the pool, debris and other contaminants from getting into the pool, a polycarbonate greenhouse was purchased, assembled and installed as a cover for the pool. It turned out to be very convenient: warm and light.

You just need to fasten it firmly, a strong wind moved it from its place. I had to make adjustments. The swimming pool at the dacha is also used in winter, but only after the bath - the ice hole is cut down)). For the winter they throw it into the water empty bottles with screwed lid. When water freezes, they serve as a damper, taking most of the load from the ice onto themselves.

And until late autumn we swim just like that, we just installed a water heating system to make it more or less comfortable.
Economy option: swimming pool from a banner
If you need an express option for a pool with minimal costs- you can get by with thick film. For example, an old banner. The fabric used for them is thick, and you can buy an old one at an agency for mere pennies. If you need a pool in your garden, this is exactly the material: the costs are minimal.
So, armed with a banner, we dig a pit, which is significantly smaller in size than the canvas.
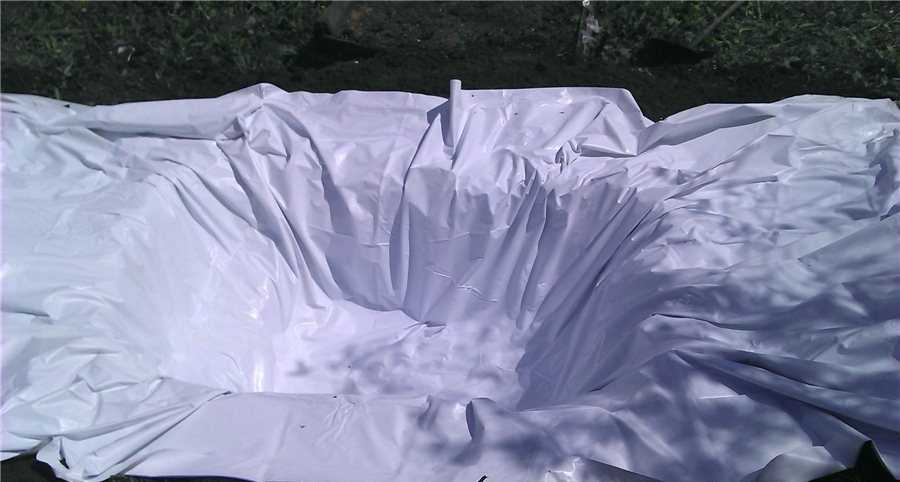
We lay the film in the dug pit and straighten it. For testing, a small pit was dug in case it wasn’t to his liking. Since the banners were old, after all, they laid two. They also tried to straighten the second one.

To prevent the edges of the film from being blown away by the wind, they were pressed down with bricks and a hose was thrown in to collect water.

While the water was being collected, a little earth was poured around the “bowl” under the film, forming sides. They were lined with bricks.
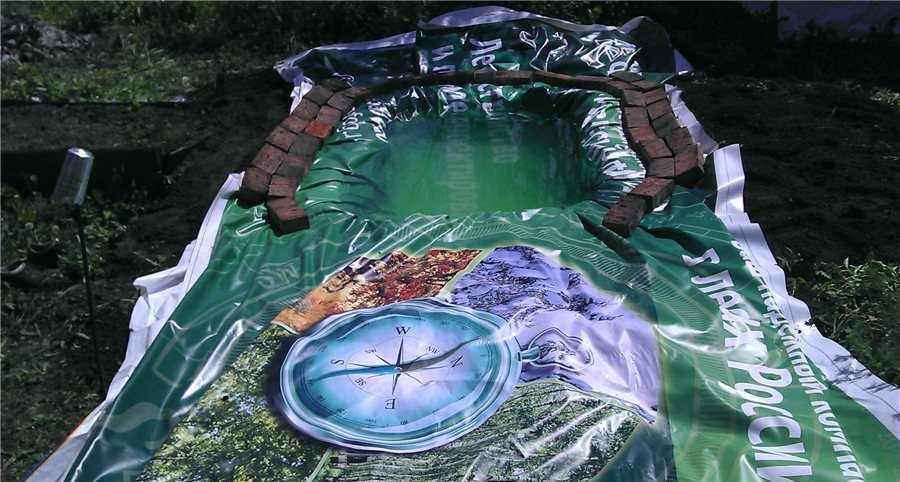
We left the “pool” to bask in the sun. Three hours later the tests were carried out. I liked the result. It was decided to expand the “swimming” part.

This, of course, is not a great option, but you can freshen up. It took 2 hours for “construction”. The main thing is to dig a pit. And what happens next is a matter of several tens of minutes. The photo below shows the same idea implemented on a larger scale. We bought the film for swimming pools and soldered two pieces together to create a more voluminous “sea”.

Here, by the way, are several country pools made from scrap materials: an excavator bucket and a huge tire.
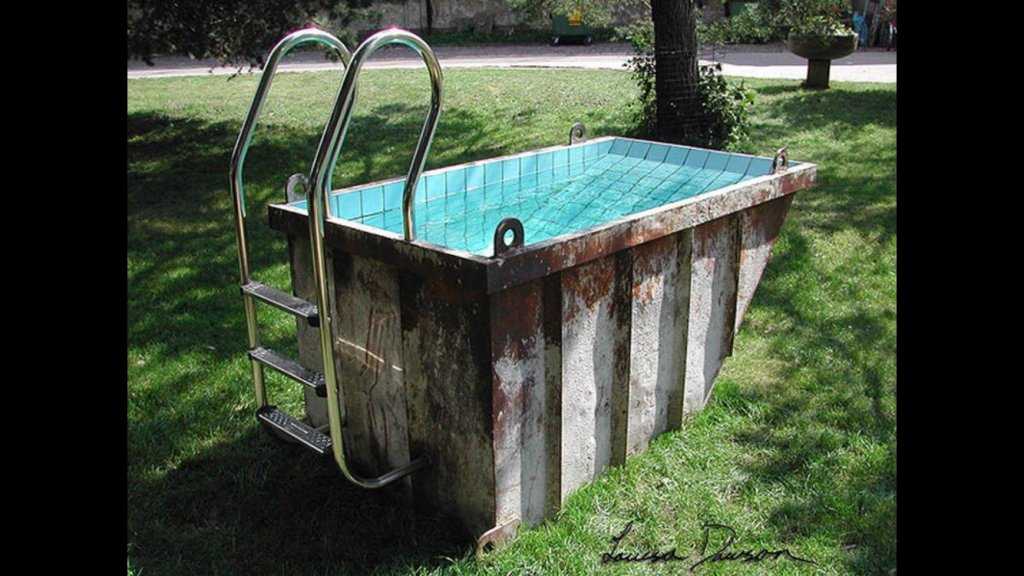
A long-lasting pool at the dacha is easy))

Photos of country pools


An inflatable pool is a great option for children

Another option for a polycarbonate pool cover. Built using the same method as