Dishonored 2 dusty quarter codes.
Dishonored 2. Walkthrough (6)
|

- General information.
6. Dust District
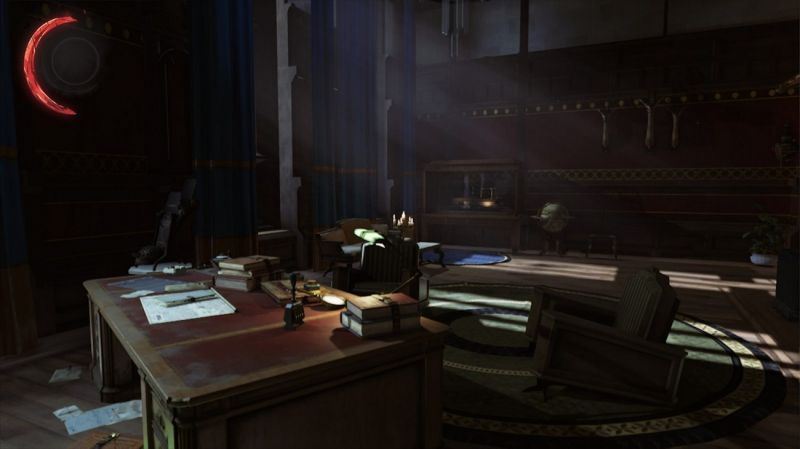
Ship "Fallen House"
Dishonored 2 Walkthrough. VoidOn the ship we communicate with Doctor Sokolov. He talks about two gangs living in a dusty quarter, and about our main goal- this is the owner of the silver mines Aramis Stilton. Megan went a block ahead of us, so Sokolov will take us on the boat.
The Rise of Batista
Dishonored 2 Walkthrough
We leave the underground channel. In front of us is a small area on a hill, there are 3 soldiers and 1 guardsman. All are easy to eliminate one by one. To the left there is a destroyed store and a second floor, but nothing inside. On the roof of the left building, turn off the windmill and go through the wall of light.
We go into the destroyed building on the right, on the first floor we find a room with a destroyed ceiling, teleport upstairs. Megan is waiting for us here and tells us what she managed to find out.
We jump onto the square with the monument to the Duke. We examine the lower floor of the house we were in, break the boards, and find a rune (1/5) in the nightstand inside.
Ahead you can immediately enter Stilton's house, but inside there is a massive door, to open which you need to solve a riddle with 10 elements: 5 surnames, 5 jewelry. A couple of people are already trying to pick the lock, but to no avail. On the right we can read the riddle for this door.
To solve the riddle, we can get additional clues from the leader of one of the gangs. But the riddle can be solved without any hints, by constructing a system of equations with many unknowns, and trying different options that do not contradict the conditions of the problem (the “Einstein’s riddle” algorithm). The correct combination is different in each playthrough.

Valia street
Dishonored 2 Walkthrough
On the left is the territory of a gang of moaners; if we enter, they will attack us. We can walk along the right street calmly, only miners live here. On the right you can crawl through the gap in the wall, this will lead to the caretakers' territory.
There's a safe shop ahead on the main street, but there's nothing interesting inside. Further on the lower floor there is a black market, but there are two bandits inside, and they need to be neutralized in order to start trading. In the store, among other things, you can buy map of Aramis Stilton's house. The back door of the store is locked with a combination lock.
Black market robbery. The store password can be found in the room on the top floor where the saleswoman lives, but this room is also locked. On the lower floor in front of the store we pass through a crack in the brick wall and find ourselves in the caretakers' territory. On that street we look through the right lattice window, we see that the door is blocked by a board, we shoot at the board with a crossbow bolt, we can go inside.
Inside the saleswoman’s apartment, we approach the desktop, in the closet near the photograph we find a note, it indicates the month of the year. In the corridor of the room we find a calendar with dates circled. The password for the door is as follows: the 1st digit is the month number from the note, the 2nd and 3rd digits are the circled number of this month. For example, the month of rains means that the password will be 414 . We go to open the door of the market, take away all the things inside, including the amulet (1/8), which is not on sale.
Witch's Hand Saloon
Dishonored 2 Walkthrough
On the side platform to the left of the building we can climb up. There is a balcony on the left on the 3rd floor. We enter, inside a nest of wasps and zombies. You can open the windows in the apartment, one of them leads to a narrow alley behind a fence, we get out there and enter the window of the neighboring house. Inside in the nightstand there is a rune (2/5). You can exit through the front door; it does not open, but it can be broken down with a grenade explosion.
Basement. We return to the main building of the wailers. On the right is the entrance to the basement. The caretaker is tied up in the basement. Take the amulet (2/8) on the table nearby. On the table around the corner there is drawing "secondary winding" (1/3).
1st floor. Bandits are dancing on the ground floor, here two musicians are performing 2nd song of Sirkonos, which you must listen to to achieve.
2nd floor. In a big chest drawing "spiked grenade shell" (2/3). Among the bandits is Mindy Blanchard, whom we met in the second mission.
There is a locked door on the floor, it requires Duran's key, but Duran himself is captured by the caretakers, the key must be looked for there.
To eliminate the bandit leader Paolo, he must be killed or stunned twice. After the first time, he disappears and leaves behind a pack of aggressive rats. The second time he appears is in his room upstairs. We stun him again, then search him. We find the dried hand of a witch on him, trample it, and Paolo loses his magical power. After searching Paolo, we take him from him three amulets (3, 4, 5 /8).
3rd floor. In the leader's room we find the Alien altar, runes (3 and 4/5), painting by Vera Moray (1/3). In the next room painting by Paolo (2/3).

We take the stunned body of Paolo, we can easily go with him to the territory of the caretakers, we will be greeted as a hero. We enter the outpost, go up to the top floor, communicate with the black leader, as a reward he gives us the correct code to the door of the mansion.
In the office of the leader of the caretakers on the left from the table we take Duran's key, below in the nightstand there is an amulet (6/8).
4th floor. From the corridor of the upper floor we teleport even higher to the side parapet. We enter the right side of the abandoned floor, in the rubble we find an audiograph and painting by Stilton (3/3).
2nd floor. There is a locked door here, the key to it can be found in Duran's room, at the wailing base.
1st floor. On the first floor we find Duran's dead body.
Abandoned house of Corvo Attano. In the caretakers' territory, we walk along the street to the left of the outpost, at a dead end we climb into the window of the third floor. We find ourselves in the house where Corvo lived 30 years ago. In the left room with a bed, we examine the left wall, remove a couple of bricks, find a hiding place in the wall, there is a Cup "Blade of Verbena".
On the street in the caretakers' territory we climb into the window of a side building. Inside is an amulet (7/8) and a silver ship prism.
Locked rooms
Having received Duran's key, we return to the moaners' saloon. Open the locked door on the 2nd floor. Inside correct code to the mansion door, amulet (8/8), key to the silver printing studio.
Having received the second key, we return to the outpost. On the 2nd floor we open the locked door, inside there is a rune (5/5) and souvenir. (If we don’t want to help either side, we can bloodlessly eliminate both group leaders. To do this, they need to be brought to this silver printing room and put in boxes. Later they will be sent to distant lands).
Let's watch the introductory video. 15 years have passed since the assassination of Empress Jessamine Kaldwin. Guests from all over the Empire arrived at Dunwall Tower on this day.
The walkthrough is written with a stealth mode orientation.
1 - Long Day in Dunwall
They lock us in the Empress's chambers and later they want to take us to Coldridge Prison. We try to leave the room through the door. It's locked. In this case, open the right window in the room and climb into the next one. We examine Captain Mayhew. In the last minutes of her life, she says that the captain of the ship, a certain Megan Foster, was looking for us.

It's time to get out of the tower. We go out to the stairs and get rid of the guard. We take the key to the royal chambers. We go down the stairs to the floor below and remove the second guard. We enter the throne room. And so, the target can be killed or stunned. We will resort to the second method. We wait until he goes to the exit, follow him and quietly remove from behind. We take the ring. Now we are heading to the treasury, in which we will leave our friend, since there is a lot of water and supplies there. We open the door with the help of the ring, bring in the body and do not forget to lock it from the inside. Non-lethal takedown completed successfully. In the treasury, naturally, we find some gold in the safes. We take our equipment and go out.


We get out onto the roof and climb down. Falling from a small height will not affect your health bar in any way. There will be an enemy below. We jump on him from a height and press to stun him. Next you need to get to the ship through the city. We jump down, open the hatch and go down to the ground. We go around the guard on the left side. In the building on the left side you can find a safe, the code to which is inscribed under the picture on the wall. I had 451.

Further along the road we take cover from enemies on the left behind the walls. Behind the gate we go into the pub and exit through the back door. We stun the two guards below and jump from the pier into the water. We sail to the ship. We climb onto the ship and go talk to the captain. She will help you leave Dunwall.
2 - Strange visit

We wake up and try to leave. The door is closed. We turn around and observe that a passage has opened in the wall. We exit the cabin through it. Along the floating islands we reach the marker where we meet the Alien. After the conversation, you can choose whether to accept a mark from him or choose the “No skills” path. Using the Transfer ability, we teleport to another platform. Next, take the heart and use it to find the first rune.
2 - Fallen House
We examine the cabin, take the amulets from the table and head to the exit. A gift from Sokolov is waiting for us on the door - a crossbow. We go out and take the to-do list on the table. This will open a new optional quest.
There is a hatch on the deck at the bow of the ship, going down through which we will enter Sokolov’s room.
We approach Megan Foster and talk to her. Sokolov was kidnapped by the Royal Assassin. Megan followed them to the Addermere Institute. We must try to eliminate the Royal Assassin and find out something about Sokolov.
We go up to the deck to Megan's boat and go on a mission.
2 - At the End of the World

Foster takes us to the pier. Now let's go on foot. We go left along the road and find a sign on the wall indicating an underground market. At the market you can buy ammunition, potions, various kinds of improvements, etc. We go up to the second floor of the building, and immediately in the window we notice a girl beckoning us. We climb through the window and find out what she needs. She introduces herself as Mindy Blanchard and says that she has something for us - she will help us get into the Addermere Institute. In exchange, we need to get one body for her. You can find him at the caretaker outpost.

We exit through the door nearby and head straight into the alley. At the turn the hostile zone begins. The path is blocked by a light wall - a dangerous guarded device that will burn any stranger to the ground. You can go through it in different ways. This wall is powered by a wind turbine. Let's turn off the windmill - we'll provide ourselves clear path further. In addition, you can go around the wall through houses using alternative routes.

We move to the windmill, climb up and pull the lever. It is now safe to walk through the wall. We go straight and climb the wall to the left. There we remove one guard and pass through the gate near the sleeping guard.
Enlist Mindy's help (optional) Near the sleeping guard we are transported to the balcony in the next building. We pass right through it and go out onto the balcony on the other side. We move to the neighboring building. You can also enter the outpost in several ways - through the main door, or by climbing over the awnings and through the window directly to the desired floor. On it we remove two caretakers and take the key to the interrogation room from one of them. Through the glass you can see the corpse we need on the chair. We open the interrogation room and take the body. We leave the building through the window, heading along the awnings to the right. At the corner of the building we go down to the basement and meet Mindy. We put the corpse in the hole. In return we get a service - she cut off the power to the rails. As long as there is no tension, you can walk on them as much as you like. This is a great way to get to the station bypassing the guards. |


Immediately after the gate we turn left towards the trash cans and climb the wall. We jump over the fence. The electricity on the tracks is turned off, we run along them until we find the train to the Addermere Institute. The guardsman standing nearby near the luggage can be stunned if necessary.
3 - Good Doctor
We arrive at the island of the Addermere Institute. Here we need to find an old ally, Anton Sokolov. Surely the head of the institute, Alexandria Hypatia, can tell us something about him.

We enter from the right side through main entrance. We find ourselves in the lobby and go around the enemies on the left side. We teleport to the wall in front and near the wall of light we move to the tank with blubber to turn off the current supply. We wait until the guy in red's attention is diverted and go behind the wall. We study the map of the institute. According to it, Dr. Gapatia's office is located on the fourth floor. We go into the elevator and choose the desired number. In the elevator, upon arrival at the floor, we hide on the left side to avoid unnecessary attention from the guards. We listen to the dialogue, after which we knock out one of the remaining guards.

We go into the office and pick up Doctor Hypatia’s key on the table. We go down to the third floor and enter the convalescent ward using the key. We pass through the hall with corpse wasps, transferring can help with this. In the next room we find Alexandria Hypatia and talk to her. There is still news about Sokolov, despite some oddities in his behavior, Kirin Jindosh took him to his place.

Let's go search the convalescent wards. We find Vasco on one of the beds. He tells us that the Royal Assassin is Doctor Hypatia. She's not herself, but the serum has changed her mind. Vasco says she can be saved. His safe at the clinic contains everything needed to create an antidote. On last minute life he says the code to the safe.
We return to the stairs and go down to the floor below. We turn into the left door. We remove two guards. We open the door and find a safe in the room on the left. We use code 551 on the safe. We take Vasco's diary and head to the room opposite for a syringe. After which we go to the room with corpse wasps and collect blood from the infected body. We return to the laboratory and create an antidote. Turn on the burner and wait until the liquid pours into the container. We fill the syringe and go to the doctor. We teleport behind her and inject the antidote. The Doctor returns to his usual appearance.

We return to the lobby to the elevator and go out into the backyard. We go around the guards and move towards the tower. We remove two more near the tower and take out the tank with blubber. Now Megan Foster can swim closer to evacuate us from the island.
4 - Fallen House
As it turned out, Sokolov was captured by another inventor named Kirin Jindosh. He armed Karnak with mechanical warriors who are no worse than the best Karnak fighters.
We wake up in our cabin. Meet Megan Foster. She advises talking to Hypatia, who decided to live a little on the ship.
We go to Megan at the boat and set off to rescue Sokolov from the clutches of the scientist Kirin Jindosh.
4 - Mechanical Mansion
The passage to Jindosh's mansion is guarded by soldiers and you can get there by carriage. But the passage to the carriage is blocked by a light wall.
We get out of the sewer and teleport up to the city. Along the balconies of the houses on the right we move closer to the rails.

Now we go to the light wall. We move to the visor next to the reconfiguration panel and wait until the soldier standing next to him moves to the fence so that he can be stunned. We do this and reconfigure the panel. Now we can go inside without fear of being hit by a deadly charge.

Otherwise, you can go further than the light wall and go around it between the two houses. At the back of the station, where the light wall is located, we climb onto the train and move to the roof. Through the windows at the top, we get straight to the roof of the train, which will take us to Upper Aventa.
The gate to Jindosh's mansion will be closed. To travel further you need a special code. There is another way to penetrate the territory of the mansion by moving around small islands. But to do this, you need to turn off the light wall near the building or take the path in the alley, but for this you need the key to the gate, which is located with an experienced fighter on the top floor of the building.


After which we get into the wagon and drive straight to the target’s mansion. There is only one way inside the mansion itself - through the main entrance.
In the lobby we turn on the audiograph to familiarize ourselves with the “safety precautions”. We enter the main hall and pull the configuration lever. Although you don’t have to pull it, just break the window from above and climb in. We immediately run to the front and wait until the door in the middle of the two stairs is accessible. We enter it. Open the next door and climb through the window on the left. There is free space behind the walls. We go straight, approximately in a direction parallel to the corridor from which we got behind the wall. We go around and are transported upstairs on the billiard table. We go to the right, going around the hall with the charging pole. We open one of the three windows and eliminate the female guardsman using a sleeping dart. Then the man was shot a second time. It will be more convenient if you hit him before he notices the body. Otherwise, the sentry soldier will be an additional obstacle. In the room we turn right to Kirin's chambers. We try not to make any noise; there is a sentry soldier inside. Through the room you can immediately get to Jindosh by pulling the configuration lever, but this may “wake up” the sentry soldier, because... They hear very well, but they do not see. We pass the bedroom further and see a stunning view of Karnaca. We move to the hatch at the base of the tower and go into the elevator.

We go straight up to the top floor “Office”. Again, the game offers a choice: kill or find another safer method of elimination. Because We're going through it in stealth mode, we'll try to find something interesting. He is guarded by two sentry soldiers. We lure one to the elevator and eliminate him. First, we jump on him from behind and blow off his head, then the second finishing blow. Such an elimination will not be considered a murder in statistics. Then we remove the second one. We teleport behind Jindosh and stun him or shoot him with a sleeping dart. We go down to the lab. There are two platforms with settings. On one we select the Anatomical stand and on the second the Optical stand. We put Jindosh on the electric shock machine in a chair. Let's launch it. It sharply impairs memory and thinking. After charging the current, it can be considered neutralized.

Now all that remains is to find Sokolov. Jindosh lets slip where he is being kept - in the testing room. We go to the elevator and go down to the testing room by pressing the appropriate button. We leave and walk along the corridor. Turn off the light wall. Be careful because... there is a guard walking around there and she will definitely notice that the wall is disabled. We stun him from behind and go out to the hall. We approach the entrance and pull the configuration lever. These are puzzle rooms. A sentry soldier walks inside. We stand on the button on the floor and as soon as the walls go down we teleport into the room to the left. Then go straight and break the boards on the floor that cover the button. We stand and wait until the walls begin to descend, immediately aim upward and move to the room with Sokolov. We take it and leave in the same way.
We go up the stairs and teleport to the pipe on the wall. We walk along it to the elevator. We move to the hatch on top of the elevator, open it and get inside. We press the button for the top accessible floor and go up to the room where the two guards at the entrance to Kirin Jindosh’s room were removed. We go out through the windows and behind the walls we make our way back to the windows. We leave Sokolov there and, having climbed through the window, go to the door to which we ran at the very beginning of the level, when we changed the configuration for the first time. Near it, we pull the configuration lever and return behind the walls, pick up Sokolov and follow the path perpendicular to the corridor and which we got behind the windows. There we jump over some lowered walls and pull the next lever. While the floor platform is lowering, we climb onto it and teleport upstairs to the main hall closer to the exit. With the next movement, we teleport to the door of the mansion and leave it so that the mechanical warriors do not have time to notice us.

Select "Go to Nizhnyaya Aventa" and go to the station. All that remains is to return to the Foster boat and get out of here. We take Sokolov from the crew and are transported to the roof of the station. On the left side we go down to the canopy and make our way around the left to the balconies on the building. We go down to the sewer and put Sokolov in the boat.
5 - Another strange visit

We wake up again in the cabin with a strange feeling. We leave the cabin. The Abyss again, but now it’s different. This time Delilah called us here. We walk along the abyss and look into the past through living pictures. From time to time Delilah will appear and talk about her childhood herself. After this, a portal will appear with an exit from the Abyss.
5 - Fallen House
We wake up and see Jessamine's soul. We leave our cabin and go to discuss further plans with Sokolov and Foster. While in captivity, the artist learned that one of Delilah's comrades was Brianna Ashworth. It should be eliminated.
We go to the boat with Megan to move on to the next task.
5 - Royal Cabinet of Curiosities
The entrance to the Kunstkamera is guarded by soldiers. Megan advises visiting caretaker Byrne first. He secretly watches over Ashworth from a secret outpost.

Find out what Viceroy Byrne knows (optional) |

We get back onto the roof and go behind the light wall. Near the light wall we are transferred to the right to the security post, from there further between the houses along the pipes and roofs we make our way to the red building. On the roof we go through the door, go down the stairs to the floor below and go into another room. In it we go out onto the balcony. We cross the balcony to another building - on the contrary, we go into an open room, through it we go out to the balcony on the other side. There the door to the fence will be knocked down. We climb onto it and teleport to the tower with a searchlight. We turn off the power and go downstairs. Having traced where the wires from the light wall lead, we turn it off and go through the main entrance to the territory of the Kunstkamera. Immediately after the light wall we turn left and at the end we climb onto the ledge on the building. We pass along it to the main ambush and find an open window on the right. We climb out onto the roof along the balconies and chandeliers. On it you can see a patio below, on the second floor level there is an open window. We teleport to the pipe near it and climb inside. We got inside the cabinet of curiosities. All that's left is to find Brianna.

Let's go look for old lenses. We climb to the floor above and pass along the corridor to the window, through which we teleport to the roof. There we climb into the next window of the room, where the old lenses for the oracle are located. Brianna's office and she herself are, in fact, located on the floor below. We return to the Oracle and install the old lenses. After which we start the car and watch as Brianna loses her strength. The object has been eliminated.


All that remains is to search her office. On the table we pick up a paper in which the maid says that she put the old audiograms in the basement archive. We go to the elevator at the end of the hall and break the boards on the stairs to the basement. Below we move the cabinet against the wall and find a secret passage into the room with the audiogram. We listen and go out through the gray door, leaving the Kunstkamera through the sewers. We will go out near the place where the watchtower was turned off. We return to Megan Foster’s boat in the same way as we went to the Kunstkamera.
6 - Fallen House
We wake up and go to discuss plans with our allies. Megan has gone to the city, so Sokolov will give instructions. In the dusty quarter through which we will have to make our way to get to the mansion of Aramis Stilton, two factions are at war - the Wailings led by Paolo and the caretakers led by Byrne. They both want to destroy each other. Each of them will immediately attack us on their own territory, but if we bring one of them the body of his enemy, they will undoubtedly accept us as their own.
We go to the boat and go out, this time with Anton Sokolov, on a mission.
6 - Dusty Quarter
Aramis Stilton keeps Delilah's important secrets. We may finally know how to defeat her. His estate is locked with an ingenious Jindosh lock, which can hardly be opened. We head to Megan Foster, who figured out how to get inside.

We leave the sewer to the entrance to the Dusty Quarter. Hiding behind the tank, we move into the building on the left. We go up the stairs to the roof. In addition, if you look at the wall, you can see a window - another way to the roof. There will be two guards on the roof. We are waiting for a storm, which will help us be a little more invisible. We remove the two guys and turn off the windmill. We jump from the roof onto the officer in red, thereby softening our fall. On the left we approach the light wall, which is already de-energized. We teleport past the guard for her. We meet in the building with Megan.
If we remove one of the leaders of the warring parties, either Paolo or Byrne, then their enemies will help us get into the mansion of Aramis Stillton. We leave the building. There are no man's lands here. Next comes the division into controlled areas. We approach the gate to the mansion. On the right we take the riddle of Jindosh. It is generated every campaign and it is impossible to find the answer to it on Google. Therefore, you will have to figure it out yourself. Or he will turn to the leaders of the groups.


We get to the entrance to the rangers' territory. On the left we climb onto the roof and teleport to the balcony. From there to the nearby lantern, then to the counter and wooden scaffolding near the building will complete our journey in search of the High Overseer. We climb onto the window from above. We open it and find ourselves immediately in Byrne’s office. We wait for the moment when the supreme caretaker is left alone or out of sight of the other caretakers, we strangle him and take him with us. We leave through the same window and head to Paolo. In exchange for Byrne's body, he gives us a clue to the lock on the door to Stilton's mansion. Now we are heading along the ground, without fear of anything, to the Jindosh castle. We set up a combination of the lady's surnames and objects in accordance with Paolo's hint.
7 - Crack in the universe

About three years ago, a magical ritual associated with Delilah Copperspoon was performed at the mansion of Aramis Stilton. We need to find out more about Delilah's secrets. In the Stilton estate, we cannot use our superpowers, it drains spiritual energy.
We enter the building through the main doors. You can hear voices inside. This is Stilton. We go up to the second floor and turn left. Having passed a little, we turn right and go along the corridor straight to Stilton’s bedroom. There will be a hole in the floor through which we jump down, near the piano we find Stilton. We are trying to talk to him. At this moment, the Alien appears and says that Stilton is stuck in time. Now he is as he was three years ago that evening. The alien gives us a device - a kind of time machine that takes us back to the past.

Press [F] to open the mirrors and see what happened in the past at the moment. There is a guard behind the door. We listen to their conversation and wait for them to leave the place. Press [RMB] to make a time transition. There is a note on the outside door telling you where to look for him. It is said that he has the code to the office with him, and Stilton himself is now in the backyard. We go out into the lobby, turning on the present time. There is a door to the right of the main staircase. We approach it and return to the past. There will be a note on the door. It states that access to the premises is limited due to the Duke's visit. The key is with the captain, who is now in the dining room. To enter almost any room of the mansion, you need a universal key. We return again to the present and climb the stairs to the second floor. Once at the top, go through the door on the right. To get into it, we again return to the past with the help of a compass. We follow her along the corridor to the end. Behind the fence on the ground floor you can see the dining room. We return to the present again and jump to the first floor. We climb under the table and use the mirrors to find the key lying on the chair. We go to the past, take the key and go further under the table closer to the windows. When there are no “walking legs” nearby, we crawl out from under the table and quickly return to the real ruined mansion.


We turn 180 and go through the opening, turn right and find an open storage door. There is a hidden passage, but it is blocked by a statue. We are transported back in time, the statue is already located in a different place. We hit the red part of the lift and the statue will fall. Now we return to the present and he will already lie in this place where he fell. We pass through the hole in the wall and reach the door, which we open with the universal key. Behind it, we turn the corner to the left and climb into the elevator shaft. Using the compass, we go back in time and take the elevator to the second floor. We exit from it through the mine hatch and go left. We change the time again so as not to get noticed by security. In the present time, one mourner will interfere, wandering around the nest of corpse wasps. It's better to stun him from behind and save ourselves the trouble of detection when we travel through time. Getting rid of the guards at the door leading to the backyard is quite simple. In the past time, we distract them by hitting the sword against the wall and move to the present. We wait for them to separate and stun them one by one, moving into the past.

We climb onto the fence and look around. We go to the present time and euthanize two stray dogs with darts. Let's go to the gazebo. We jump behind her onto a wooden structure with corpse wasps and change time. We wait for the moment when Stilton turns away, we jump into the gazebo, eliminate Aramis with a choke hold and take the code. Immediately change the time to the present. On the right side near the structures we return to the building. We go upstairs to the office, without fear of detection by the maid and other people. We change the time, making sure that in the past there is no one nearby and enter the code on the panel. We enter the office and observe the actions of Duke Abele and his allies. Some interference is observed in this place; two times intersect here at once. After listening to the conversation, we move to another room where a seance will take place.

Now Delilah's soul is placed in a special vault, which will be guarded by Luca Abele. She became immortal.
We follow to the exit from Stilton's mansion. At the exit we find ourselves in the Abyss. After walking a little around the islands and listening to the Alien, we are again brought back through the portal to the present. To eliminate Delilah, you need to destroy her soul, which she hides in a special place.
8 - Fallen House

We wake up and again see the appearance of Jessamine in front of us. We get out onto the deck through the open hatch. We talk with the allies, who have already been joined by Aramis Stilton himself. He says that it will not be difficult to get into the building where Luka Abele is located; in addition, the entrance to the ducal treasury is hidden in the closet. If he keeps something valuable, it is only there; most likely Delaina's soul is hidden there. We get into the boat with Megan Foster.
8 - Grand Palace
Duke Luke Abele has a double. It is needed to confuse the killer. The fact is that the double has an addiction to smoking - a way to recognize the true duke.


At the pier we go up the stairs. We walk between houses. We are entering a hostile zone. We go straight up the small stairs and climb onto the metal platform around the tree. We carefully move to the balcony of the neighboring building, avoiding the spotlight of the security tower. Through the rooms inside we go out to another balcony. We move to the tower and turn off the power supply, taking out the tank with blubber. Bypassing the tower we teleport to the balcony where corpse wasps live. If you destroy their hives, the chance of being bitten is much reduced. We break the boards on the door and climb up to the stairwell. We go up the stairs and go out onto the roof. You can also get in through a window in the wall or through a window on the roof. We get rid of the two guards in any way. I shot one with a poisoned dart, jumped on top of the second, stunning him. We pull the lever and turn off the windmill that supplies current to the light wall. Nearby there is an underground shop where you can buy one piece of paper, thanks to which the rails will be de-energized for us. You can take them directly to the palace. We make our way to the entrance to the Grand Palace.


We teleport to the rails and along them we reach the Abele Palace. Having overheard a conversation between the two nearby, we learn that the Duke keeps the key to the treasury with him. We teleport to the high lanterns, along them we move to the roof of the palace. On it we find a window leading to the elevator shaft. We go down there, call the elevator and go to the floor of the Duke's chambers. We climb into the hatch so as not to be noticed at the wrong moment and find Luka or his double. We remember that the double smokes. We are monitoring this goal. In my case, he didn't smoke. Therefore, this guy is the real Duke of Abele. Well, now we need to find a double.


You can find it to the left of the hemispherical dome, on a triangular platform. There is a discharge column there, so let's turn it off first. We follow the wires and find a shield near the stairs leading down. We take out the tank with blubber and go upstairs. Teleport to wooden roof and go to the very end to the sharp corner of the triangular roof. We are watching him. He asks to leave his guards alone. A great time to talk to your double. We poison the dog nearby with a dart and approach him to talk. We choose the option with a double. We can overthrow the Duke without killing him, take a peaceful path, but for this we need the help of a double. The plan is to convince everyone that the double is the real Duke, and that Duke Luke Abele is an impostor. Thus, the double will rule. He will make a better ruler. Double learn the role of the Duke to perfection. But the means of recognition is the medallion worn by the real Duke.

We again make our way into the chambers of Luke Abele. We stun him and take the key to the treasury. We take the body and take it to the bed. We watch a cut-scene where the real Duke is taken away by the guards. Luka Abele can be considered eliminated.

All that remains is to find Delilah's soul. In the chambers we go out to the stairs that lead down. We go down to the basement to the very bottom. There are two guards wandering around there, we eliminate them and find a button on the shelf near the wall. We press and the door opens. The key opens the vault door. Inside, a sentry soldier is guarding the whole thing. You can ignore it and quickly move to the statue of Delilah and immediately interact. After this, the mechanical warrior will be automatically destroyed. We go up the stairs to a higher level and approach the black door. We press the button and wait for it to open. We go in and immediately to the right we cut off the electricity at the discharge column. We go down to the water and go to Megan Foster. We wait for the boat to arrive and leave the Grand Palace.
9 - Fallen House
We wake up and go to a meeting with Sokolov and Foster to discuss returning to Dunwall. First we talk with Sokolov, then we turn to Megan on deck. She admits that her real name is not Megan, but Billy Lurk. 15 years ago she was in a gang. The leader was Daoud. She helped him kill Empress Jessamine. We take a boat and go to Dunwall.
In the game Dishonored 2 There are black markets where you can buy various upgrades and also find out some information. In this guide we will try to figure it out, how to rob the black market.
At the end of the world
You have to climb through the window through which you got to Mindy Blanchard. Once in the house on the floor with the piano, find a small hole that is hidden behind the sofa. Climb into it and move up the stairs. There you will meet enemies. After killing them, take the key from the aquarium. You can now open the door in the place where you met Mindy Blanchard.
Mechanical Mansion
Near the black market you want to rob, find a homeless man and pay him. From him you will learn that someone wants to rob the market by blowing up the wall. At the carriage station, look for a barrel of blubber and take it. Now you need to find the bard building and climb to the highest balcony. Once in the building, go down to the basement. Place the barrel against the desired wall and shoot at it.
Royal Cabinet of Curiosities
Shoot the chain through the bars. As a result, you will unblock the passage to the sewer. Find a valve near the black market. Near the entrance to the sewer, use the valve to open the gate and climb up the chain.
Dusty Quarter
Not far from Jindosh Castle, you need to walk between two rickety buildings. Move to the right and look for a building green. There will be a black market there. Inspect the building, find a piece of wood that prevents you from opening the door and shoot at it. Inside you will see a wedding photo. Move to the calendar that hangs on the wall in the corridor. Wedding date - code to the door lock.

Grand Palace
Find the backyard gate code in the safe shop. Listen to the audiograph on the opposite side of the shop entrance. Climb onto the balcony on the second floor. Turn on the audiograph and return to the black market.
Dishonored fans have been eagerly awaiting the release of the sequel, and now a few years later they can once again step into the shoes of a skilled killer and plunge headlong into a mysterious world full of amazing stories and mysteries. Like the original, the second part boasts an interesting plot and great variety in gameplay - you can complete missions in several ways, some of which are much more effective than others. In this Walkthrough of Dishonored 2, we will not describe the plot in detail, but will focus on the versatile implementation of the main plot tasks.
Background
Fans of the series will probably remember that Corvo Attano, the main character of the original, still managed to save Emily Kaldwin, the new empress of the Island Empire, from the hands of terrible conspirators. However, from that moment on, he began to be constantly tormented by the fear that new murder attempts might be more successful, and therefore he decided to turn the girl into a real death machine. It is thanks to this decision that in the second part players will be able to play not only as Corvo, but also as Emily.
In the end, it turned out that our brave warrior was not worried in vain, since another coup d’etat took place in Dunwall, during which the empress and her bodyguard had to move to the city of Karnaka, located in Serkonos (a neighboring state). Here our heroes have to think about how to return to their homeland and at the same time take the reins of government again.
According to the developers' description, Emily is no longer a frightened girl, but a skilled warrior, ready to do anything to regain her throne. Corvo trained her well, but she is not a copy of her master, as she has her own unique fighting style and set of magical skills.
Although the main part of Dishonored 2 will take place far from Dunwall, where the events of the original took place, you will still be able to meet many familiar characters, for example, Anton Sokolov, a talented scientist.
Mission 1: Long Day in Dunwall
The main character (heroine) is locked in the room of the new Empress, to later be taken to Coldridge's prison cell. Try to exit the room through the main door. It will be locked. Therefore, it is worth opening the right window and climbing into the adjacent opening. Approach Captain Mayhew. With her last breath, she will tell you that the owner of a small ship named Megan Foster has been looking for you everywhere.
Get out of the turret. To do this, you can go to the ladder and eliminate the guard. Take the key to the royal chambers from him. Go down to the bottom floor and deal with the second guard. Enter the throne room. The right goal You can simply try to stun him or send him to the next world. It's up to you to decide, but we will still describe the passage from the point of view of stealth and a minimum of chaos. Wait until the subject approaches the exit, get out of cover and stun him from behind without attracting attention. Take the ring from the body and head to the treasury, where you can leave our friend (he will not die of hunger, since there is food and water here). Open the door using the ring, bring in the body and lock the poor fellow from the inside. Here you can find gold and your equipment. Take everything and leave.
Get onto the roof of the building and slide down from it. Don't worry - falling from such a height will not remove hit points from your character. There will be an enemy below. Jump on top of him and hold Ctrl to stun him. Then run to the ship, passing the city. Jump down, open the hatch and go down to solid ground. Go around the guards on the left side. In a building located at left side on the main street you can find a safe.
Then take cover behind the wall from your opponents. After passing through the gate, enter the bar and exit through its back door. Take out two more guards below and jump straight into the water. Swim to the ship, climb on it and chat with the captain. She will agree to help you sail away from the city.
Strange visit

After the character wakes up, try to leave the cabin. The door will be locked. Turn back and watch in amazement as a passage appears in the wall. Exit the room through it and reach the Alien via the floating islands. Talk to him and choose your path: you can take the mark and gain unique abilities, or refuse it and remain an “ordinary” person (which makes the passage noticeably more difficult). Using the Transfer skill, move to the opposite platform and take the heart (a special device for searching for various artifacts). Use the heart to find the rune.
Fallen House
Examine the cabin, take the bone amulets from the box on the table and go to the exit. On the door you can find a surprise from Sokolov - a powerful crossbow. Leave the room and take the to-do list lying on the table. As a result you will get additional quest by unlocking the pantry door. You can enter this room through a window located outside the ship. Go out onto the deck and go down to one of the walls of the ship. Climb through the window and destroy the obstacle lying by the door.
Go out onto the deck again and go to the bow of the ship, where the hatch is located. Open it and go downstairs. So you will find yourself in Sokolov's room. Walk up to Megan and chat with her. Thus, you will learn that Sokolov was kidnapped by the Royal Assassin. The girl managed to track him to the Addermis Institute, but then the trail disappeared. In the future, you will need to deal with this killer and find out the fate of the scientist.
Go up to the deck and approach the Foster boat. Now you can go on the next mission.
Mission 2 – At the End of the World

Exit through the door and go to the nearby alley. At the turn, a dangerous zone will begin, where guards can attack you at any moment. In addition, the road will be blocked by a light wall, which is a deadly device capable of burning any trespasser. This structure is powered by a wind turbine. Take him out to go through the light wall.
Walk forward a little, and then climb the wall on the left side. Eliminate one guard and go through the sleeping guard through the gate. Then turn left and go to the trash cans. From here you can climb the wall. Jump over the fence and go down to the train tracks (you can do this if you previously completed Mindy Blanchard's side quest and brought her the body). If you didn’t complete the side effect, then you can get to the desired location through the station - you just have to first turn off the power to the wall of light by pulling out the blubber tank in the room on the right, not reaching the wall. Run along the tracks until you come across a train going to the Addermere Institute. If necessary, you can deal with the guardsman standing not far from the luggage.
Mission 3 – Good Doctor
After arriving at the Addermere Institute, you will need to find your old friend Anton Sokolov. You should ask Alexandria Hypatia, the head of the institute, about him.

Enter the building through the main entrance, located on the right (This is not the only way to enter; before reaching the entrance, you can jump from the ledge onto the rocks and go around the building on the left, where you can get into the kitchen through the open window - secret penetration). You will find yourself in the lobby. Go around the opponents on the left side. Move to the wall in front. Near the wall of light, move to the container with blubber in order to deactivate the power supply. Wait until the guard in red is distracted, and then go behind the fence. Look at the map of the building. In it you can see that Hypatia’s office is located on the 4th floor. Go into the elevator and press the desired button. When you reach the desired floor, hide on the left side so as not to be seen by the guards. Listen to the conversation of the guards, and then knock out the one who remained at his post.
Go into the office and find Alexandria's key on the table. Go down one floor and go into the department where they keep patients recovering. To do this you will need the above key. Go through the room with bloodflies (you can use transfer). In the next room you will find Hypatia. Chat with her - you will learn that Sokolov was kidnapped by Kirin Jindosh.
Now it’s worth searching the room for recovering patients. Vasco can be found on one of the beds. He will tell you that the Royal Assassin is actually Dr. Alexandria. Now she is not herself, as some serum has zombified her. However, the girl can still be saved. Vasco's storage room contains all the necessary ingredients for crafting an antidote. Before he dies, he will tell you the code to his safe.
Go back to the stairs and go down one floor. Go through the first door on the left. Deal with the two guards, open the door and find a safe in the room. Unlock it using code 551. Take Vasco's diary and go to the room opposite - here you can find a syringe. Now head to the wasp room and collect blood from the infected corpse. Return to the laboratory and create an antidote. Turn on the burner and wait a few seconds. Fill the syringe with the antidote and head to the doctor (royal assassin). Move behind her and inject the medicine. Hypatia will be able to return to normal.

You need to go to the lobby to the elevator and get to the back patio. Go around the guards and head to the tower. Stun the two guards near the tower and take out the container with blubber. This will give Megan the opportunity to swim closer to you and transport you from the island to the continent.
Fallen House
It turned out that Sokolov was captured by another genius inventor, whose name is Kirin Jindosh. It was with them that Karnaca was armed with mechanical soldiers capable of fighting at the level of the best warriors in the city.
Wake up and leave the cabin. Talk to Foster. She will say that it would be nice for you to chat with Hypatia, who has decided to live on the ship for a couple of days. This is kind of a side quest. Go to the doctor and have a heart-to-heart talk with her. She is sitting in the pantry.
Mission 4 – Mechanical Mansion
The entrance to the house where Jindosh is located is under 24-hour security and can only be entered with the help of a crew. However, the passage to the transport is blocked by a wall of light.

The first step is to get out of the sewer system and move to the upper part of the city. Using the balconies on the buildings on the right side, get to the rails. In this place you can do additional task upon receipt installation tool at a black market store. To do this, bypass the security and go to the underground trading shop. Go down the stairs and talk to the sellers. She will tell you that at the moment she cannot sell this little thing, since unsavory individuals should come to her. You need to hide under the table and eavesdrop on the conversation. When the criminals leave the store, come out of your hiding place and buy the tool. If the bandits see you, a fight will break out.
Next you can head towards the wall of light. Teleport to the visor located not far from the panel with the device settings, and wait until the guard decides to retreat to the fence. Stun the guard and reconfigure the panel. Now you can get inside without worrying about your character’s life.
You can also not deactivate the light wall, but go a little forward and go around the fence between a couple of buildings. Behind the station where the fence is, climb onto the freight train and jump onto the roof. Find the windows at the top and use them to find yourself on the roof of a new train that can take you to Upper Aventa.
The gate leading to the desired building will be locked. To open them you will need a special code. However, there is another route that can lead you to the territory of the house - you will need to move between small islands using transfer. In the second case, you will first have to cut down the light wall, which is located near the building or head into the alley, but for this you will need the key to the gate, which is kept by an experienced soldier located on the top floor of the above-mentioned building.

If you decide to still find the gate code, you will thereby additional mission. So, to do this, you should go into a nearby building and go up to the top floor. Here you will find an office where an experienced military man sits. Deal with him and take the required code (641) from the table. Next, you should open the window and move to the panel using your abilities.
Then you need to get into the wagon and go straight to the mad scientist's house. You can only get inside through the main entrance.
Once in the lobby, turn on the audiograph to learn the safety rules. Enter the main room and use the configuration lever. Then run forward and wait until access to the door located in the middle of the two stairs opens. Go through it, and then open another door and climb through the window opening on the left. Behind the walls you can find a small free space. Head straight ahead, make one circle and climb onto the pool table. From there, go upstairs.
Turn right and walk around the hall where the charging pole is located. Open one of the 3 windows and deal with the girl by the guard using a tranquilizer. Then you need to shoot the man. Try to make sure that the guard does not notice the woman's body. Otherwise, you will also have to eliminate the sentry soldier. Once in the new room, turn right again and head to Kirin's chambers. Try not to make too much noise, as there is a guard inside. Thanks to this little room, you can immediately find yourself in Jindosh's laboratory by using the configuration lever. However, these actions can lead to the activation of the clock soldier. Go forward, ignoring the bedroom, and get to the hatch located at the base of the turret. Then go into the elevator.

You need to go up to the top floor. Here you will have to make another decision: kill the enemy or find a more humane method of eliminating the target. Since we decided to complete the game in stealth style without killing, we will choose the second method. Our target is guarded by two sentry soldiers. First, lure one of them to the elevator, and then eliminate it - jump from behind and blow off its head, and then carry out a finishing attack. Killing a sentry is not murder. Next, deal with the second guard.
Now you should teleport behind the scientist and knock him out (you can use darts). Go down to the laboratory and find two panels with settings. On one of them you should select the Optical stand, and on the other, the Anatomical one. Next, you need to put Jindosh on the chair of the electroshock device and activate it. This equipment corrupts the brains of the test subject. After one charge, the target is considered neutralized.
Next you need to start searching for Sokolov. During interrogation, Jindosh accidentally names the place where he is old friend the main character - he sits in the testing room. Go to the elevator and go down to the desired room. Exit and move forward along the corridor. Cut down the wall of light. There is a guard on duty nearby, who will immediately see that someone has turned off the fence. Stun him from behind and go into the hall. Reach the entrance and pull the configuration handle. Eventually you will end up in puzzle rooms. A sentry soldier is walking here. Stand on the button on the floor and wait until the walls go down. Then teleport to the room located on the left.
Next, go straight a little and break a couple of boards on the floor covering the button. Stand on it and wait a bit. The walls will lower and you will be able to move upstairs. Next, head to the room where Sokolov is being held. Take it and exit the same way.
Climb the ladder and transfer to the pipe located on the wall. Walk along it and get to the elevator. Go to the hatch located on top of the lifting device. Open it and go inside. Click on the button for one of the upper floors that is currently available to you. Exit through the window, and then make your way behind the walls back to the windows. Leave Sokolov here and climb through the window again. Head towards the door you previously had to run to initial stage mission (when using the configuration for the first time). Near it, pull the lever and return behind the walls. Take Sokolov again and follow the path that is perpendicular to the corridor. Jump over the lowered walls and use the next lever. As the platform descends, climb onto it and be transported upstairs to the main hall to be closer to the exit. Then teleport directly to the door of the building and exit without causing an alarm.

Head to Nizhnyaya Aventa for the right composition. Now you should head to the Foster ship and sail as far as possible. Take the artist from the crew and move to the top of the station. Go to the left side and go down to the canopy. Make your way along the balconies of the buildings to sewer system, and then put Sokolov in the boat.
Another strange visit
Wake up while in your cabin. Get out of it and you will find yourself in the Abyss, but it is not similar to the past reality. The fact is that you were called here by Delilah. Take a walk on this creepy place and learn a lot about the past by looking at the “living” drawings. Sometimes Delilah will appear and tell you about her childhood. Then a portal will appear and you can leave this location.
Fallen House
Wake up again. Ahead you will see Jessamine's soul. Leave your room and approach Foster and Sokolov to talk to them about your future plans. While in captivity, the artist was able to learn that one of Delilah's main allies was Brianna Ashworth. It's time to deal with her. Go to the boat to take on the next mission.
Mission 5 – Royal Cabinet of Curiosities
Several soldiers guard the entrance to the Kunstkamera. Megan will advise you to first go to caretaker Byrne, who has been watching Ashworth for a long time, being in a secret outpost.
As a result, you can take on an additional task and find out what information Byrne has. It is not necessary to do this. If you decide to go through it, then go upstairs near the stairs and enter the building located in front. Then go out onto the balcony and move from it to the roof of the structure. Then jump to the other balcony. On the roof you will have to deal with three guards. Two of them stand near the fence, and the third is on duty on another part of the roof. The first one can be knocked out with a dart, and the second one can be stunned. You shouldn't have any problems with the third one. Find an open window on the roof and look through it. You will see a sleeping caretaker below. Jump down and knock him out. Then take out the audiograph and listen to the voice message. You will learn that Byrne suspects Ashworth that she is beginning to meddle in the affairs of the Order of Oracles.

Go back up to the roof and go through the light wall. Near the fence, move to the right to the guard post. Then make your way to the red building, passing through the houses, pipes and roofs. On the roof of the red building, go through the door and go down the stairs to the lower floor. Go into the open room and from it get out onto the balcony. Then jump onto the balcony located on the opposite building.
Go inside the house and get to the far side. Go out to the balcony on the other side. There you will find a door knocked onto the wall. Climb onto it and be transported to a tower equipped with a spotlight. Deprive her of access to electricity and go downstairs. Find out where the fence gets its power from by following the wires. Cut down the light wall and go through the main entrance to the courtyard of the Kunstkamera. Then turn left and go to the end of the area. There you will find a ledge on a building. Walk forward along it and find an open window located on the right. Make your way to the roof by moving along the chandeliers and ledges in the walls. Once on the roof, you will see a small courtyard below and an unlocked window at the 2nd floor level. Teleport to the pipe located near the window, and then get inside. So you will find yourself in the Kunstkamera. Now we need to find Brianna.
Here you can also complete another secondary task (optional) and find out how exactly Ashworth manages to influence the Order of Oracles. To do this, go through the door located opposite the window you crawled through earlier. This will give you access to the main hall. Find the Oracle. Near it you can read a warning written by Brianna. It reports that the first version of the oracle lenses almost killed her, and almost deprived her of all her powers.
Go hunting for old lenses. Climb to the top floor and walk along the corridor to the window. Look out of it and move to the roof of the building. Here, find another window leading to one of the rooms of the mansion, in which the lenses you need lie. Brianna sits in her office downstairs. Return to the Oracle and install the item you found earlier. Fire up the equipment and enjoy the show as Ashworth loses all his powers. The target has been eliminated.

Now you should rummage through her office. It is worth picking up a piece of paper on the table, where the maid tells the hostess that she has put all the old audiograms in the basement. Go to the elevator located in the main hall and break the boards on the stairs leading to the basement floor. Below you should move the cabinet standing near the wall in order to find a secret passage. Go inside and find the audiogram you need. Listen to it, and then exit through the gray door. You will find yourself in the sewer. Follow it to the end to get out of the cabinet of curiosities. The exit from the sewer system is located next to the place where you knocked out the security tower earlier. Next, return to Foster’s boat and sail with it to a safe place.
Fallen House
Wake up and go to your allies to discuss future plans. Megan went to the city, so you will receive further instructions from Sokolov. He will tell you that you will have to visit a dusty quarter where two factions are at war: the Wailing, led by Paolo, and the caretakers, led by Byrne. Both leaders dream of dealing with each other. They all dislike strangers, and therefore immediately attack them. But if you bring one of the leaders the body of his sworn enemy, he will accept you as his own.
Go to the boat, and then go on the next mission.
Mission 6 – Dusty Quarter
Aramis Stilton has many secrets related to Delilah. Perhaps, thanks to this information, you will be able to find out how to deal with her. However, his mansion is locked with the help of a cunning Jindosh lock, which cannot be opened by conventional methods. Go to Foster, who figured out how to get inside.
Exit the sewer and you will find yourself near the entrance to the Dusty Quarter. Take cover behind trash can, and then go to the building on the left. Climb to the roof using the ladder. Here you will meet two guards. Wait for the storm to start and knock out the guards. Then turn off the windmill. Jump from the roof onto the officer wearing a red uniform. Then approach the light wall located on the left. Move over the fence and meet Megan inside the building.

If you eliminate one of the leaders of the two factions (Byrne or Paolo), then the remaining faction will help you penetrate the Stilton estate. Leave the house. There are neutral lands here, but in front the territory is divided into several regions controlled by one faction or another. Approach the gate leading to the mansion. On the right side of the gate, pick up the Jindosh riddle. Tips for solving it are presented in our separate article.
Go to the entrance to the rangers' territory. Climb onto the roof of the left building and move to the balcony. Next, teleport to the lantern standing nearby, and then to the stand and scaffolding near the structure. Climb to the top window. Open it and climb inside. You will be taken to Byrne's office. Wait until the High Overseer is alone in the room. Strangle him and take him with you. Exit through the same window and take the body to Paolo. He will tell you how to solve the riddle. Now you can walk the streets without fear of being killed by crowds of bandits. Go to Jindosh's castle and open it.
Mission 7 – Crack in the Universe
Three years ago, an occult ritual was performed at the Stilton estate, which is directly related to Delilah. Need to know about this magical rite and the secrets of the new empress. Let us note in advance that in this mansion it is impossible to use the abilities granted to your character by Aliens.
Go to the desired building through the main entrance. Inside you will hear strange voices that belong to Stilton. Go to the top floor and take the left passage. After a few steps, turn right and walk forward along the corridor until you reach Stilton's bedroom. There will be a huge hole on the floor. Jump down and find the owner of the estate not far from the piano. Try talking to him. Suddenly, out of nowhere, an Alien will appear and tell you that this person is in a temporary trap. A supernatural being gives the hero a special device, thanks to which you can travel through time.

Press the "F" key to open mirrors that show what happened in a particular room in the past. There are several guards behind the door. Eavesdrop on their conversation and then wait until they move further away. Click on the right mouse button to make a time jump. On the other side of the door, find a note saying that Stilton is walking in the courtyard. The code for his workplace is on him.
Exit to the lobby and move to the present. There is a door to the right of the main staircase. Get up close and take a trip back a few years. Another note will appear on the door stating that it is closed due to see you soon Duke You can find the key to it from the captain, who is in the dining room. This key is universal, that is, you can use it to open almost any door in the mansion. We talked in more detail about his search in a separate article. After finding this item, you should go to the windows. As soon as there are no guards nearby, get out from under the table and return to the present time.

Turn in the opposite direction and go through the opening. Next, turn right and look for an unlocked door that allows you to get into the storage room. It has a secret passage blocked by a statue. Travel back in time, where the statue stands in a completely different place. Destroy the lift by hitting one of its parts to bring down the statue. Return to our time - the passage will be open.
Go forward through the hole in the wall and reach the door opened with the master key. Then turn left and jump down the elevator shaft. Using the Alien device, travel back several years and go up to another floor using the elevator. Exit through the hatch in the ceiling and take the left corridor. Change the time again to hide from the guards. In the present, you may be disturbed by one mourner walking near the bloodfly nest. Stun him from behind immediately so you don't waste your time on him in the future. Deal with the guards standing near the door leading to the courtyard. This is easy to do - distract them by hitting them with your weapon against the wall, and then stun them one by one.
Next, climb the fence and look around. Travel to our time and use darts to put the two dogs to sleep. Approach the gazebo. Behind her is located small design made of wood with wasps. Jump on it and go back in time. Wait until Stilton's back is turned to you, then jump on him and neutralize him. Take the code and then travel to the present.
Return to the building, go up to the top floor and go to Stilton's office. Once you reach the door, travel back in time and enter the code into the panel. Enter the room and watch the Duke and his companions. Here you will find strange anomalies, since this is where the past intersects with the present. After listening to the conversation, head to another room where a seance will take place.

It turned out that Delilah's soul was hidden in a special vault guarded by Luka Abele, that is, it is impossible to kill it by ordinary means (game version of Koshchei).
Go to the exit of the building. Near the door you will fall back into the Abyss. Walk around the flying islands and listen to the Alien. He will then return you to the present. So, to neutralize Delilah, the first thing you need to do is take her soul, hidden in a secret place.
Fallen House
Wake up - you will again see the image of Jessamine next to you. Go out onto the deck and talk with your companions, among whom will be Stilton. He will tell you that getting into Abele's house will not be difficult. Plus, there is a hidden door in the closet that leads to the Duke's treasury. Most likely, this is where Delilah's soul is located. We get on the boat with Foster.
Mission 8 – Grand Palace
Luka Abele hired a double as insurance. However, it is quite easy to recognize him, since the hired “actor” likes to smoke.

Once on the pier, go up the stairs and walk between the two buildings. Enter a hostile area. Go up the stairs again and get to the metal platform located near the tree. Carefully move to the balcony located at the neighboring building, and try not to get caught in the light of the spotlight installed on the security tower. Go inside the building and exit to the balcony on the opposite side. Move to the tower and knock it out by taking out the tank.
After passing through the tower, you will be transported to the balcony where bloodflies live. We advise you to burn their nests to reduce the chance of being bitten by them. Break the barrier on the door and make your way to the stairwell. Climb up and exit to the roof of the structure. Deal with two guards here: one can be put to sleep with a dart, and the other can be stunned from behind. Then press the lever to shut down the windmill and deactivate the wall of light. Nearby there will be an underground shop where you can purchase a document, using which you will be able to cut down the rails. This railway will take you to the palace.

Listen to a conversation between two characters standing near the entrance to the building. From them you can find out that the Duke always carries the key to the treasury with him. Transfer to the pillars with lanterns, and then get to the roof of the structure. Here, find an open window that leads directly into the elevator shaft. Go downstairs, call the elevator and press the button for the floor where the Duke's chambers are located. Climb into the hatch to hide from prying eyes and find the Duke (or his double). We remind you that the fake Luca loves to smoke. Observe your target. If he doesn't smoke, then this is the real Abele. Now we need to find the “actor”.
You can find the desired NPC on the left side of the dome located on the site triangular shape. There is also a discharge column here that should be deactivated. Follow the cable and find the desired panel near the ladder that leads to the bottom. Take out the tank and go up to the top floor. Observe the target. IN certain moment he will decide to release the guards. Then you need to talk to them. First of all, we launch a dart at the dog, and then we begin a conversation with the fake Abele. As a result, you will have a chance to remove the Duke without sending him to the next world. You just need to convince everyone in the area that the double is actually Luka. This way, someone else will take over the reins. He will make a good ruler. For the plan to succeed, it is necessary to take the medallion from the real Duke and give it to the impostor.

Again, head to the place where the Duke is. Stun him and take the key to the treasury. Next, take the body and take it to the sofa. A cut-scene will start in which the guards will take Luka away and his double will take his place.
Now we need to find Delilah's soul. Exit to the stairs leading down. Go down to the basement and deal with the two guards. Find a button on one of the shelves and press it to open the entrance to the secret room. Use the key to open the door to the vault. There is a sentry soldier inside. You don't have to deal with them - you can just teleport to the Delilah statue and click on it. This action will cause the mechanical guard to self-destruct. Climb to the upper level and approach the black door. Click on the button and wait for the passage to open. Go inside and turn off the power near the pole. Go down and find Foster's boat. Now you can leave this location.
Fallen House
Rise and shine, Mr. Freeman... that is, leave your cabin and go to Foster and Sokolov to talk about returning to your city. First of all, talk to Sokolov, and then contact Megan. She will tell you that her name is actually Billy Lurk. About fifteen years ago, she was part of a group led by Daoud. At that time, she helped him arrange an assassination attempt on Jessamine. Take a boat and sail to Dunwall.
Mission 9 – Death to the Empress
You now have Delilah's soul hidden in the Heart. It is necessary to get to the self-proclaimed empress and “pour” the soul into the body. As a result, Delilah will become mortal and you will be able to kill her.

After disembarking, head to the pier and move to the structure with billboard. Go around the next house on the left side and climb onto the roof. Next, teleport to the balcony. Go to the wooden structure in front of which the witch is standing. Shoot her with a dart and move towards her. Go down to the ground and put a couple of dogs to sleep. Run to the Dunwall tower, and then turn onto the street, which is strewn with the bodies of the caretakers. One of them will be alive. Talk to him, and then be transported to the roof of a nearby building and get along it to the palace. Stun the witches that get in your way and get to the door leading to the tower.
You need to get to the top floor into the throne room. Turn right and go to the elevator. Here you will find a note that says that the empress decided to cut off the power supply, and therefore the elevator stopped working. Go back to the door to the tower and try to crawl into the passage that is littered with debris.
Note: However, supplying energy is not the only option. Do you remember Jessamine's secret room behind the fireplace from the first Dishonored? It's still accessible, you can still get there. On the second floor, in the corner (where the lone witch is guarding), pull the lamp and climb through the fireplace into the secret room. And there is a secret passage, unlocked with a ring key. Open it - and voila - you go straight to the Safe Room of the throne room.
Now you will have an additional, but optional goal to complete - you need to search the caretaker chapel. Move to the other end of the hall along the chandeliers to avoid being seen by your opponents. Go downstairs and open the door leading to the corridor. Climb onto the ledge located at the top and go to the chapel. Take the note lying on the table, which tells you about the harmony of the runes. Two defiled and two pure runes should be combined with each other to achieve harmony, but if it is disrupted, Delilah’s magic will turn against herself. Craft a Corrupted Rune using ingredients found in this room.

Now you can leave the chapel. Approach the door opposite. There is a sentry guard in the room, so you should immediately move to the pipe hanging above so that the robot’s sensors cannot detect you. After he passes by, go through the door ahead and go down to the security room. To restore energy you will need one tank of blubber. Find an empty container in the dispenser and place it at the filling station. Then place the filled tank into the system. Electricity is supplied to the elevator again. A witch will enter the room. Go around it and get out of the room.
Move onto the pipe again and turn towards the left corridor. Go all the way until you see a blocked door ahead. Go down and go behind the witch into the door that is not yet locked. Once in the kitchen, turn left and jump into the ventilation. Walk forward along the sewer system and find a door leading to the main hall. Move to the second level, then teleport to the chandelier and exit into the corridor, passing through the blocked hole. Call the elevator and wait for it to arrive. Hide, as the witch will immediately move towards him. Deal with the enemies, go into the elevator and press the top button.
Go to the roof of the building and approach the entrance. Someone had boarded it up with wooden beams. Destroy the obstacle with the blade and go inside. Take the heart in your hands and quietly approach Delilah from behind. Use the artifact to return the girl's soul. She will immediately run into one of the paintings. Go after her, not forgetting to place the desecrated rune on the throne.
If you want to thwart the plans of the villain, then you should place the stunned body of Delilah on the throne, where the desecrated rune already lies. However, this will not be easy, since she is guarded by her terrible copies. Another optional task will appear here, related to the destruction of copies of the Empress. At the location you can find several crowds of characters, in which there is one copy of the enemy. There are five of them in total. First of all, move to the right building. Near the fence, deal with the first copy. Next, go down a little and look for another enemy in the crowd.
Go back and go around the building on the left side. Climb the black wave and deal with the third copy. Now you should move to the opposite side and remove the fourth double. Go down and destroy the fifth copy. If you want to deal with her quietly, then you will have to use long-range weapons. Now all that remains is to take on the secret copy sitting on the throne.
After your actions, the real Delilah will appear. You should immediately move to a stone structure supported by columns and jump on top of the enemy to stun him. Raise your body and return to the painting. Exit her and place Delilah on the throne. A cut-scene will begin in which it will be shown that the girl is forever locked in her own drawing. Now you need to save someone close to you - Corvo or Emily (this depends on who exactly you are playing the game with).
Next, you will be shown a final video with the consequences of all your decisions. All possible endings are described by us in a separate article.
Fun with safe breaking moved to the sequel straight from the first part. The difference, however, is that now there are more password-protected fireproof cabinets, and the developers have made the codes for most of them randomly generated, so that you, dear players, without relying on a call to a friend and the help of the audience, can circle around the locations in search of keys and hints. In addition to the safes themselves, the game also contains doors that are locked with a combination lock. I will also tell you about them and even show you where to look for the treasured three-digit combinations. Rest assured, your Corvo and Emily will make excellent bugbears, they just need a little help sometimes. Unfortunately, there are no achievements/trophies for demonstrated thief skill, but the contents of the safes themselves can already be considered a reward. After all, when you're on the run, any extra coin comes in handy.
MISSION No. 1
Number of safes: 2
1. Safe in the treasury
Guide to opening safes and combination locks in Dishonored 2
 Guide to opening safes and combination locks in Dishonored 2
Combination: the safe is not locked
The treasury has a storage room, and in it there are two safes. You can pick it up from one of them gold bar(150 coins), which I strongly recommend you do.
2. Dr. Galvani's SafeGuide to opening safes and combination locks in Dishonored 2
 Guide to opening safes and combination locks in Dishonored 2
Combination: 451
After our protagonist gets out of the rooftops Towers and finds himself on the streets of the capital, he will have the opportunity to look into a couple of houses in the immediate vicinity of the tightly locked palace gates. Dr. Galvani's home is located literally a stone's throw from the city guard's booth.
Guide to opening safes and combination locks in Dishonored 2
 Guide to opening safes and combination locks in Dishonored 2
We go inside, from the hallway-hallway we find ourselves in the laboratory, we cut out in one way or another the guard who for some reason got in there and look around. The safe stands against one of the walls, and the code to it is hidden behind a picture above the fireplace, which we have to take anyway - it is also a collectible item. Inside the safe our hero is waiting two silver bars(total: 150 coins) and several pistol bullets.
Interesting. The code for Galvani's safe is something of an Easter egg. Firstly, it is identical to the code from the very first safe in the first Dishonored. Secondly, this combination of numbers has become a traditional reference to the novel by R. Bradbury “Fahrenheit 451”, found in many games, including the first SystemShocks, Deus Ex, BioShock, Gone Home, where the same code opens the most the first in-game safe or combination lock. And back in the 1990s, this code was used to open the door in the office of Looking Glass Studios, the creators of both SystemShocks and the first two Thieves. In addition, the very possibility of enclosing the doctor’s apartment is also an Easter egg. And in the first part, Corvo could look into Galvani’s empty apartments and bomb his safe. The scientist then lived on Clevering Boulevard, in close proximity to the Office of the Supreme Overseer and the Golden Cat establishment. |
MISSION No. 2
Guide to opening safes and combination locks in Dishonored 2
 Guide to opening safes and combination locks in Dishonored 2
Number of safes: 2
1. Safe in the office of the Viceroy Supreme Overseer
Guide to opening safes and combination locks in Dishonored 2
 Guide to opening safes and combination locks in Dishonored 2
Combination: random
Viceroy Liam Byrne's office is located on the third floor of the wardens' outpost - this is a red building with a banner, its front facade facing the canal and Canal Square.
Guide to opening safes and combination locks in Dishonored 2
 Guide to opening safes and combination locks in Dishonored 2
You can get to the desired room either by stairs from the first floor, or directly from the street through the balcony.
Guide to opening safes and combination locks in Dishonored 2
 Guide to opening safes and combination locks in Dishonored 2
The safe is installed in the rest room, adjacent to the office and separated from it by a glass partition. Naturally, it is locked, and the code for it is randomly generated for each playthrough. A hint that allows you to guess the three-digit code lies on the table in the meeting room next to the office - the note “Taboos that will save you.”
Guide to opening safes and combination locks in Dishonored 2
 Guide to opening safes and combination locks in Dishonored 2
The prohibitions listed in it are the key; you just need to determine their serial numbers. This can be done either with the help of the book “Seven Prohibitions”, which the developers carefully left on the table next to the safe...
Guide to opening safes and combination locks in Dishonored 2
 Guide to opening safes and combination locks in Dishonored 2
Guide to opening safes and combination locks in Dishonored 2
 Guide to opening safes and combination locks in Dishonored 2
Or by examining any of the signs listing the prohibitions that decorate the walls of the chapel, located on the same third floor. In the latter case, in Magazine hero, a corresponding entry will be added, where the serial numbers of the prohibitions will be indicated.
Guide to opening safes and combination locks in Dishonored 2
 Guide to opening safes and combination locks in Dishonored 2
Guide to opening safes and combination locks in Dishonored 2
 Guide to opening safes and combination locks in Dishonored 2
The safe will please Corvo/Emily three silver bars(total 225 coins), and also rune And whale bone.
2. Safe in the Winslow Safe Company storeGuide to opening safes and combination locks in Dishonored 2
 Guide to opening safes and combination locks in Dishonored 2
Combination: random
The Winslow Safe Company store is located opposite Addermere station.
Guide to opening safes and combination locks in Dishonored 2
 Guide to opening safes and combination locks in Dishonored 2
A safe with an amulet and other “goodies” is hidden under the stairs leading to the upper tier of the trading floor, and a piece of paper with a code for it is in a drawer cash register at the entrance to the store.
Guide to opening safes and combination locks in Dishonored 2
 Guide to opening safes and combination locks in Dishonored 2
The code to the safe is generated randomly for each playthrough. Our hero is waiting inside two silver bars And one gold(total: 300 coins), as well as a simple amulet And pistol bullets.
MISSION No. 3
Guide to opening safes and combination locks in Dishonored 2
 Guide to opening safes and combination locks in Dishonored 2
Number of safes: 2
1. Safe in the catalog
Guide to opening safes and combination locks in Dishonored 2
 Guide to opening safes and combination locks in Dishonored 2
Combination: random
Once in the foyer of the Addermere Institute, teleport to the second floor gallery - where the blubber installation is located, feeding the light wall. There is no other way to the catalogue.
Guide to opening safes and combination locks in Dishonored 2
 Guide to opening safes and combination locks in Dishonored 2
From the gallery you can get into only one room - the archive or registry (many catalog cabinets seem to hint).
Guide to opening safes and combination locks in Dishonored 2
 Guide to opening safes and combination locks in Dishonored 2
At the far end of this repository of medical or other information there is a locked safe, the code to which is randomly generated. Fortunately, the note with the correct combination is kept almost side by side, on the table opposite the entrance to the catalogue.
Guide to opening safes and combination locks in Dishonored 2
 Guide to opening safes and combination locks in Dishonored 2
For your efforts, your bugbear hero will receive coil of copper wire And silver bar(for a total of 85 coins), and also drawing of a combat sleep dart.
2. Safe in Vasco's officeGuide to opening safes and combination locks in Dishonored 2
 Guide to opening safes and combination locks in Dishonored 2
Combination: random
Gaining access to Vasco's safe is a required part of the quest line for the non-lethal elimination of the Royal Assassin, which is activated after talking with Vasco. Barely alive, he will be found in the room behind the large hall (operating room), where we will get after passing the ward with corpse wasps in the convalescent ward.
Depending on whether we immediately start a conversation with Vasco or first decide to listen to the audiograph located nearby, the wounded poor fellow will either have time or not to whisper to us the code to his safe before his death.
Guide to opening safes and combination locks in Dishonored 2
 Guide to opening safes and combination locks in Dishonored 2
In the second case, the hero will have to rob his lifeless body for the sake of the note “To the one who finds my corpse,” where the correct combination is indicated.
Guide to opening safes and combination locks in Dishonored 2
 Guide to opening safes and combination locks in Dishonored 2
The office with a safe is located in the right wing of the second floor of the institute, in the clinic department.
Guide to opening safes and combination locks in Dishonored 2
 Guide to opening safes and combination locks in Dishonored 2
There are two quest items inside it - Vasco's laboratory key And "Note on the Antidote", – as well as a portion Addermere medicine.
MISSION No. 4
Guide to opening safes and combination locks in Dishonored 2
 Guide to opening safes and combination locks in Dishonored 2
: 2
1. Safe in Corrie Brockburn's office
Guide to opening safes and combination locks in Dishonored 2
 Guide to opening safes and combination locks in Dishonored 2
Combination: random
The safe is located in the house next to the Aventa station, in the office on the second floor. The required entrance opens into a narrow passage separating the house from the side facade of the station.
Guide to opening safes and combination locks in Dishonored 2
 Guide to opening safes and combination locks in Dishonored 2
Guide to opening safes and combination locks in Dishonored 2
 Guide to opening safes and combination locks in Dishonored 2
The safe is in the office. Nearby on the table is a note from the owner of the office, which says that he wrote down the combination in the usual place. Where exactly? On the board opposite the entrance to the office. Of the three numbers, only two have survived, and even those are covered with a bottle, but it doesn’t matter.
Guide to opening safes and combination locks in Dishonored 2
 Guide to opening safes and combination locks in Dishonored 2
Guide to opening safes and combination locks in Dishonored 2
 Guide to opening safes and combination locks in Dishonored 2
We put both known numbers on the safe, and find the third by simple search. Our hero's catch will be two silver bars And sphalerits for luck(total 165 coins), and also book "Meeting of Regents".
2. Gate in Upper AventaGuide to opening safes and combination locks in Dishonored 2
 Guide to opening safes and combination locks in Dishonored 2
Combination: random
The gate control panel is located at the station at the Serkonos Guard outpost, and a note with a combination that allows you to open these gates (“ New code from the gate"), is kept in the office of the senior officer of the outpost.
The office is located on the third floor of the outpost. We go up there, go through the door with the inscription PRIVATE ( unauthorized entry prohibited), we pass a room that looks like a classroom and find ourselves in an office.
Guide to opening safes and combination locks in Dishonored 2
 Guide to opening safes and combination locks in Dishonored 2
I advise you not to make noise - Mr. Officer is at home. He was just very tired and dozed off right at his desk. Snatching the piece of paper with the combination from under his nose is easy.
Guide to opening safes and combination locks in Dishonored 2
 Guide to opening safes and combination locks in Dishonored 2
Profit from a hacked gate is an opportunity take a breeze on a rail carriage to Jindosh's mansion.
MISSION No. 5
Guide to opening safes and combination locks in Dishonored 2
 Guide to opening safes and combination locks in Dishonored 2
Number of safes: 1
1. Safe from a former lecture hall
Guide to opening safes and combination locks in Dishonored 2
 Guide to opening safes and combination locks in Dishonored 2
Combination: random
Where lectures used to be given are now swarming with corpse wasps. Fortunately for our hero, they did not touch the safe and its contents.
The wasp-infested building is located between the bar and the square in front of the Kunstkamera. The most convenient way to get into this breeding ground of vile insects and the abode of the nest guard is from the roof of the bar.
Guide to opening safes and combination locks in Dishonored 2
 Guide to opening safes and combination locks in Dishonored 2
But the code for the safe installed there is sold in an underground shop for 250 coins (187 coins after completing the merchant’s quest). Look for a black market shop in the docks, not far from the starting point of the mission.
Guide to opening safes and combination locks in Dishonored 2
 Guide to opening safes and combination locks in Dishonored 2
Guide to opening safes and combination locks in Dishonored 2
 Guide to opening safes and combination locks in Dishonored 2
Considering that the safe contains 5 silver bars And wallet(405 coins in total), then it is still more profitable to steal the cipher. However, you should not rob a shop in the Kiriya Gardens until you have completed the merchant's quest, otherwise you will be left without one very interesting drawing.
MISSION No. 6
Guide to opening safes and combination locks in Dishonored 2
 Guide to opening safes and combination locks in Dishonored 2
Number of combination locks: 2
1. Door to the underground shop
Guide to opening safes and combination locks in Dishonored 2
 Guide to opening safes and combination locks in Dishonored 2
Combination: random
The armored door of the store is additionally protected by a combination lock with a randomly generated combination. A hint that allows you to guess the correct numbers is in the apartment located above the store. The situation is complicated by the fact that iron door They also cannot be unlocked with half a kick, because they are blocked from the inside by boards. However, unlike a combination lock, they can be shot. The main thing is to know where to shoot from and where.
So, to the right of the entrance to the store there is a hole.
Guide to opening safes and combination locks in Dishonored 2
 Guide to opening safes and combination locks in Dishonored 2
Let's slip into it, reach the end of the dirty gateway and turn left. In fact, we found ourselves on the back side of the house where the underground shop is located. We continue to move forward, just slowly and carefully looking at our feet. On the first floor of the house on the left there are two windows that are barred but not glazed. We need the second one, the approaches to which are protected by a tripwire trap.
Guide to opening safes and combination locks in Dishonored 2
 Guide to opening safes and combination locks in Dishonored 2
It is through this window that we will shoot the boards blocking the door to the apartment with the clue.
Guide to opening safes and combination locks in Dishonored 2
 Guide to opening safes and combination locks in Dishonored 2
Did you manage? We return back to the entrance to the store, but do not go inside. To the left of it there is a passage to a corridor with stairs leading to the second floor. Let's go there.
Guide to opening safes and combination locks in Dishonored 2
 Guide to opening safes and combination locks in Dishonored 2
We rise and go into the apartment above the store. A long corridor will lead us to the living room. The clue, and this is what we came for, is contained in the note attached to the wedding silver print. We will find both on the shelf behind the desk, at the end of the room farthest from the entrance.
Guide to opening safes and combination locks in Dishonored 2
 Guide to opening safes and combination locks in Dishonored 2
We carefully read the note and remember the month mentioned in it. This is important. In my case, it included the month of rain. We stomp back into the corridor and carefully study the calendar hanging on the wall.
Guide to opening safes and combination locks in Dishonored 2
 Guide to opening safes and combination locks in Dishonored 2
Some numbers in it are enclosed in circles. We are interested in the circled numbers of the month of rain (RAIN) and the month of heat (HEARTHS). As you may have guessed, they form a three-digit combination that unlocks the door to the underground shop. In my game it turned out to be 413, but yours will have different numbers. Bravo, we almost hacked the local store.
Guide to opening safes and combination locks in Dishonored 2
 Guide to opening safes and combination locks in Dishonored 2
Now the matter remains small. We go to the first floor of the same house, enter the resulting code into the lock and get inside. Congratulations, you did it! Well, for those who are completely afraid of getting lost, I recorded a short video guide on how to penetrate an underground shop in the Dusty Quarter.
2. Jindosh Code Lock (Jindosh Riddle)
Guide to opening safes and combination locks in Dishonored 2
 Guide to opening safes and combination locks in Dishonored 2
Combination: random
The entrance to Aramis Stilton's mansion is protected by an ingenious lock designed by the Great Inventor Kirin Jindosh. This is a quest lock, and we are simply doomed to open it one way or another, otherwise there will be no progress in the plot at all.
There are three ways to overcome the tricky puzzle:
- 1) receive the code to it from the leader of the Wailing Paolo or from the Deputy High Overseer Liam Byrne;
- 2) find out the code from a note kept in the room of a certain Duran;
- 3) strain your brain and solve the riddle yourself, without resorting to anyone’s help.
Which method to prefer - think for yourself.
1. The easiest way to get the code for the Jindosh lock is - provide an invaluable service to the leader of the Wailing Paolo or Viceroy Byrne. Which one exactly? Deliver one of them to the other, alive or dead. Having received a gift from the leader of the opposing faction, both Paolo and Byrne will be so grateful to the masked stranger that they will happily give him/her a note with the code to the door of the Stilton mansion. Look for Paolo on the first floor of the Witch's Hand saloon, and Byrne on the third floor of the caretaker outpost, in his own office. However, remember, the leader from whom you receive the key to the Jindosh castle may later become the governor of Serkonos. Are you ready for this turn?
2. If cooperation with neither the Wallers nor the caretakers suits you, try get the code to the lock yourself. To do this, you will first have to visit the office of Viceroy Byrne and steal from the table that stands at the exit to the balcony the key to the room of a certain Duran - Wailing, Paolo's confidant, who was caught by the caretakers.
Guide to opening safes and combination locks in Dishonored 2
 Guide to opening safes and combination locks in Dishonored 2
Did you manage? Now we go to the Witch's Hand saloon, where Duran lived until he was caught and died. His room is located on the second floor of the establishment and has a separate entrance from the second floor gallery.
Guide to opening safes and combination locks in Dishonored 2
 Guide to opening safes and combination locks in Dishonored 2
Our task is to find and read the note “Code to the Stilton House”. She is lying on the table.
Guide to opening safes and combination locks in Dishonored 2
 Guide to opening safes and combination locks in Dishonored 2
3. Do you want to prove to yourself that you are cooler than Jindosh? In that case take the note with the conditions of the task from the red box near the door, read it and start thinking. Or use this template to solve the Great Inventor puzzle.
Guide to opening safes and combination locks in Dishonored 2
 Guide to opening safes and combination locks in Dishonored 2
 In fact, there is a single scheme for solving the Jindosh riddle. If you don’t go into details like how this happened and why, it looks like this. Imagine a text with a riddle in general view, without specifying the ladies' surnames, names of jewelry and values of other variables. Let us have it simple Lady 1, Thing 1 etc.
THE RIDDLE OF JINDOSHA Were at a dinner party Lady 3 , Lady 2 , Lady 5 , Lady 4 And Lady 1 . The women sat in a row. They were all dressed in different colors. For example, Lady 1 wore fancy Colors 1 poncho. Lady 2 [sat] to the left of everyone, next to the guest dressed in Color 2. Lady dressed in Colors 3 dress, sat to the left of the guest, dressed in Color 4. I remember Colors 3 dress because its owner spilled on it Drink 1. Traveler who recently left Region 1, was dressed in everything Colors 5. When one guest boastfully demonstrated Thing 1 , the woman sitting next to her remarked: “My dear Region 1 famous for such trinkets.” Then Lady 3 took out her family jewel from her purse - Thing 2 . The lady who had previously told how beautiful her native land, Region 2, noted with a grin that her Thing 3 - much more rare. Another lady began to defiantly examine her relic - Thing 4 ; the guest sitting next to her (I remember her homeland was Region 3) almost knocked me out Drink 2 from the hands of his neighbor. Suddenly Lady 4 who drank exclusively Drink 3, proposed a toast. The lady who was to visit Region 4 and who leaned on the whole evening Drink 4, tried to jump on the table, but fell on the guest sitting in the middle, and she spilled Drink 5. Then Lady 5 captured everyone's attention by talking about Region 5 the times of his youth. The next morning there were 4 family jewels lying under the table: Thing 1 , Thing 5 , Thing 3 And Thing 4 . But who owned each of them? |
- Lady 1 – Thing 3;
- Lady 2 – Thing 4;
- Lady 3 – Thing 2;
- Queen 4 – Thing 1;
- Lady 5 – Thing 5.
By the way, the order of the ladies' surnames in the combination lock does not necessarily have to repeat their order at the dinner table. The main thing is the correspondence between the surname and the jewelry.
Attention. Depending on exactly how and with whose help you opened Jindosh's castle, the game will count you as having completed one of five special actions in the current chapter:
|
MISSION No. 7
Guide to opening safes and combination locks in Dishonored 2
 Guide to opening safes and combination locks in Dishonored 2
Number of safes/combination locks: 2
Attention. Mission No. 7 “Crack in the Universe” is special. Not only is it entirely tied to the hero’s movement in time between the past and the present, it also allows for changes in the present as a result of certain actions being performed in the past. How our hero ultimately deals with Stilton in the past will affect the present and determine his state with which we will finish the mission. There are three possible versions of the present at the end of the chapter, or rather, one of three:
|
Guide to opening safes and combination locks in Dishonored 2
 Guide to opening safes and combination locks in Dishonored 2
Combination: 238
The safe is located on the first floor of the Stilton mansion, in the boiler room. In the present (any) it is opened and empty, so it should be hacked in the past, when it has not yet been looted. Depending on the current version of the present, the sequence of our actions to open this safe will vary.
Option 1: original (default) present
In the original present, access to the boiler room is possible only through the storage room and the utility rooms of the mansion located behind it. We get out of the safe room with the giant bust of Stilton, turn left, then right and stomp straight to the strange barricade built above the hole in the wall. There is no further move in the present.Guide to opening safes and combination locks in Dishonored 2
 Guide to opening safes and combination locks in Dishonored 2
Guide to opening safes and combination locks in Dishonored 2
 Guide to opening safes and combination locks in Dishonored 2
Let's move into the past. There is a table where the barricade used to be.
Guide to opening safes and combination locks in Dishonored 2
 Guide to opening safes and combination locks in Dishonored 2
We climb under it, move back to the present and through the hole we find ourselves in the room we need. The nest of corpse wasps that appeared on the fallen safe can, of course, not be touched and, once inside, you can immediately go back to the past again, but I would still destroy it for the sake of the bloody amber that drops from there (there is no such thing as extra money).
Guide to opening safes and combination locks in Dishonored 2
 Guide to opening safes and combination locks in Dishonored 2
Ok, we've dealt with the wasps. Now is the time to assess the situation. In the present, the safe has been opened, but is so covered in insect waste products that of the three digits of the correct combination, only the first – 2 – is visible.
Guide to opening safes and combination locks in Dishonored 2
 Guide to opening safes and combination locks in Dishonored 2
And in the past the safe was locked. How to find out the code? The answer is obvious. It is necessary to change something in the past, so that by the present time wasps will not appear there and the safe lying around will not be removed, hiding from us the once correct code that was exposed. The clue lies again in the past, in a note thrown near the carcass of a dead wolfhound - the game hints to us that we need to get rid of the carrion, for example, by burning it. And, very usefully, there is a stove nearby, in the same room. In general, we grab the dog, load it into the firebox, press the red button to the right of it and arrange cremation for the dog.
Guide to opening safes and combination locks in Dishonored 2
 Guide to opening safes and combination locks in Dishonored 2
Then we return to the safe, move to the present, where there are no traces of corpse wasps, remember the combination (238)...
Guide to opening safes and combination locks in Dishonored 2
 Guide to opening safes and combination locks in Dishonored 2
We port back to the past again, enter the three-digit code and unlock the safe.
Option 2: alternative (either of the two) present
In the alternate present, the door to the boiler room is not locked, and therefore can be reached from the corridor adjacent to the elevator.Guide to opening safes and combination locks in Dishonored 2
 Guide to opening safes and combination locks in Dishonored 2
Guide to opening safes and combination locks in Dishonored 2
 Guide to opening safes and combination locks in Dishonored 2
Inside you will find an empty safe with a broken door and no wasps.
Guide to opening safes and combination locks in Dishonored 2
 Guide to opening safes and combination locks in Dishonored 2
We remember the combination displayed on the door (238), move into the past and open the safe. By the way, we will not find wolfhound carcasses in the past. By the time we get there, all that will be left of it is a pile of ashes in the oven.
Guide to opening safes and combination locks in Dishonored 2
 Guide to opening safes and combination locks in Dishonored 2
No matter how we open the safe, our catch will be: silver bar, two fives, Kono star tables(for a total of 135 coins), and also black amulet.
2. Combination lock from Stilton's officeGuide to opening safes and combination locks in Dishonored 2
 Guide to opening safes and combination locks in Dishonored 2
Combination: random
This is a quest lock, it is located on the second floor gallery, running along the perimeter of the Great Hall, near the doors to the office, and Mr. Stilton keeps the combination for it exclusively to himself.
We learn about where to look for the owner of the mansion almost at the very beginning of the mission from a conversation between two guards in the past - he is in the courtyard, in the gazebo. The main quest goal marker will show us the way.
Finding Stilton in the backyard will not be difficult - the gazebo is clearly visible from the second floor balcony overlooking the courtyard. A notebook with a code lies on a music stand next to the silver magnate pacing back and forth. All you have to do is get to the gazebo and just pick it up.
Guide to opening safes and combination locks in Dishonored 2
 Guide to opening safes and combination locks in Dishonored 2
Decide for yourself what to do with Stilton - put him to sleep/stun, kill, or simply leave him alone/scare him away and let him run away. However, if you intend to collect all the runes and amulets in the game, then I still recommend it. cut down, but not to kill. This way you will save his mind from clouding, his body from imprisonment in the mansion, and you will provide yourself with a number of collectible items that appear only in an alternative present where Aramis Stilton is alive.
Attention. If you decide to tranquilize/kill Stilton, then a well-aimed shot from a crossbow from the balcony of the mansion overlooking the courtyard will save you from having to climb into the gazebo for the combination from the castle to the office. Unexpected, right? As soon as the owner of the house passes out/dies, the present will change. In the alternate present, regardless of whether Stilton is alive and well or has been dead for three years, the entrance to his office will simply be boarded up. Smash/shoot them and enter. Guide to opening safes and combination locks in Dishonored 2  Guide to opening safes and combination locks in Dishonored 2 Guide to opening safes and combination locks in Dishonored 2
As soon as our hero crosses the threshold of the damned office, the game will automatically send him to the past, and later, at the end of the mission, he will count you for performing a special action "Temporary Investigator"(entering an office without a door code). Inside the office, moving to the present (any kind) is impossible. To get out of a locked room at the end of the ritual, press the red button on the wall near the door. Guide to opening safes and combination locks in Dishonored 2  Guide to opening safes and combination locks in Dishonored 2 Guide to opening safes and combination locks in Dishonored 2
|
MISSION No. 8
Guide to opening safes and combination locks in Dishonored 2
 Guide to opening safes and combination locks in Dishonored 2
Number of safes/combination locks: 3
1. Combination lock from the grate leading to the back porch of the underground shop
Guide to opening safes and combination locks in Dishonored 2
 Guide to opening safes and combination locks in Dishonored 2
Combination: random
The grate itself is located in the alley between Winslow's safe store and the infected house, in front of which two tramps are cutting bones. It is not of fundamental importance, since you can get to the back facade of the shop from the other side. And yet, there is a certain benefit from opening it - it will allow you to get to the basement with the Alien altar without having to deal with the Wailing ambush set up opposite the main entrance to the store (it appears if in previous missions you actively robbed underground shops). Guide to opening safes and combination locks in Dishonored 2
Guide to opening safes and combination locks in Dishonored 2
 Guide to opening safes and combination locks in Dishonored 2
The second note hangs on the belt of a lady hanging around the back door of an underground shop. When we first appear there, we will witness her conversation through a locked door with the owner of the store: the aunt will demand to let her in, but the merchant will demand the password that Madame has forgotten.
Guide to opening safes and combination locks in Dishonored 2
 Guide to opening safes and combination locks in Dishonored 2
To be honest, I don’t see the point in getting hold of this particular copy of the note. If you already grabbed a note with a code from a safe store, then you won’t learn anything new from the lady’s piece of paper. If you got to the back porch of an underground shop, bypassing the locked grate, then you don’t really need the code for it now.
2. Safe from the apartment of the director of the Winslow Safes companyGuide to opening safes and combination locks in Dishonored 2
 Guide to opening safes and combination locks in Dishonored 2
Combination: 123
Mr. Director's apartment is located on the third floor of a building adjacent to an enclosure with a light wall. This is the kind of apartment that allows you to penetrate the light wall without turning it off.
Guide to opening safes and combination locks in Dishonored 2
 Guide to opening safes and combination locks in Dishonored 2
Hurray, hurray, hurray! You managed to open all the safes and combination locks in the game. It’s too early to relax - the final showdown with the insidious Delilah is still ahead - but it never hurts to praise your loved one. Tell yourself: “I’m great!”, looking at the monitor, and go to the Tower. Your cause is just, and victory will be yours - I know for sure. Good luck!


