How to make a virtual reality helmet from foam plastic. How to assemble a Cardboard with your own hands: drawings, dimensions
At the latest I/O conference, Google showed its version of glasses virtual reality from cardboard. In principle, schemes for such glasses have been circulating on the Internet for a long time (for example, FOV2GO). However, the scheme of the guys from Google turned out to be simpler than their analogues, and they also added a chip with a magnet that works as an external analog button. In this post, I will share my experience in assembling virtual reality glasses based on a smartphone: Google Cardboard from cardboard, OpenDive from plastic and glasses cut on a laser cutter from acrylic.
Materials
- Cardboard. I used an unwanted laptop box. Another option is to order your favorite pizza or buy cardboard in a special store (search for micro-corrugated cardboard E).
- Velcro. Can be purchased at any sewing store. I took a strip of adhesive Velcro for 100 rubles. This tape will be enough for pairs of 10 points.
- Magnets. In principle, this thing is optional if you do not plan to use the Google API. Google itself recommends taking 1 nickel magnet and the second a ferromagnet. On our Internet there are plenty of such magnets in specialized stores, but I was too lazy to wait for the order. As a result, in the same store I bought a set of magnets for fasteners, however, they did not work quite perfectly for me. Cost - 50 rubles for 3 magnets.
- Lenses. In general, it is recommended to take lenses 5-7x, 25mm diameter, aspherical. The easiest way is to buy a magnifier with two lenses, like the Veber 1012A, which is cheaper than buying 2 identical ones. I only had a 30x magnifying glass with two 15x lenses on hand (I bought such a magnifying glass on the market for 600 rubles). Despite the excessive magnification, it turned out well.
- Elastic band and carabiner. You will need them if you plan to use the Cardboard as glasses and not hold them with your hand all the time. I bought 2 meters of elastic and a pair of carabiners at the same sewing store for another 100 rubles.
- Foam rubber. To prevent glasses from cutting into your face, you should cover the contact points with foam rubber. I used window insulation tape. Another 100 rubles on the construction market.

Final price of materials: 400-1000 rubles depending on the lenses.
Tools
- Stationery knife.
- Hot-melt glue (with a gun). Small is better.
- Stapler or thread with a needle.
Assembly
Here, in general, everything is trivial.- Go to the Google Cardboard website and download the cutting diagram. If you happen to have a laser cutter on hand, you can cut on it. If not, then print it on a printer and cut it out along the contour.
- We attach Velcro. In addition to the two Velcro in the original, I added one to left side so that the structure does not move apart. I also glued two Velcro strips on the sides, onto which we will later glue an elastic band for attaching to the head.
- We insert the lenses, a magnet and fold the structure.
- We attach 2 pieces of elastic to Velcro. At one end we insert a carabiner at a fixed distance (I fixed it with an elastic band with a stapler :)). On the other side we take an elastic band with a reserve and attach the second part of the carabiner with the ability to adjust the length.
- Success!

However, after installing the application, I discovered that my button did not work in this form. To activate the click, I had to take the magnet in my hand and move it directly along the left side of the phone, however, even this way it works only once. A sign that you are doing everything right - when you touch there should be a feeling magnetic field, which slightly pushes the magnet away from the phone.
Perhaps the reason is that I took too weak a magnet. Perhaps it's because my model (Galaxy Nexus) is not declared supported by Google. Nevertheless, the demos work, the button is pressed, hurray!
Plastic model
If you want to worry about assembling as little as possible and you have a 3D printer (or enough money to order printing), then this option is for you. :) I printed a model from the Thingverse website. There on request " virtual reality"There are several more similar options.
I ordered a print from the 3D Printing Laboratory, it cost about 3000 rubles.
All materials from Cardboard are relevant for these glasses, so the final price tag reaches almost 3,500 rubles.
Assembling a plastic model
We insert the lenses, glue the foam, and use regular office rubber bands to secure the phone. You can also cover the entire surface outside the lenses with foam rubber, then the light from your smartphone will not disturb you. Larger lenses can also be inserted into these glasses.

Another option: insert lenses from a Soviet stereoscope. To do this, you will have to slightly modify the mount, replacing the round holes with rectangular ones. The option with a stereoscope is quite convenient, but it has a disadvantage - the working area is smaller, the image is cropped at the top and bottom.

Model made of acrylic (or plywood)
Even before collecting virtual reality glasses became a trend, a wonderful design of glasses cut on a laser cutter appeared online. Without thinking twice, I decided to order their cutting in the same laboratory. They didn’t have plywood at that moment and they offered me to cut it out of black acrylic. The cost of cutting together with the material was about 800 rubles.
In addition to lenses, rubber bands and foam rubber, for assembly you will need about 20 screws with 3-4mm nuts (the author of the model suggests using 4mm, but they were difficult for me to fit in and I took 3mm).
Oddly enough, the final version turned out to be even better than the 3D printer. Firstly, the glasses are lighter and more compact. Secondly, the material is smooth and more pleasant to the touch. The downside is that acrylic is a fairly fragile material, and such glasses may not survive a fall.

Conclusion
Unfortunately, there is still very little content for such glasses. You can try playing with streaming, as described in a recentVirtual reality is amazing world, immersing yourself in which you get a lot of unusual impressions. But in order to move into the three-dimensional dimension, you need to have special glasses. They are quite expensive in the store, but it is not difficult to make them at home. You just need to know how to make virtual reality glasses with your own hands. The easiest way is to make an analogue.
What will be needed for production?
In fact, you don't need to buy any to make glasses. large number tools and materials. You just need to have:
- A gadget with which you will immerse yourself in the virtual world. This can be a smartphone or tablet (smartphone is preferable)
The more modern the device is, the more spectacular the game will be. The size of the phone or tablet is also not important. The only thing is that the smallest side must be equal to at least two distances between the pupils of the eyes. But you shouldn’t take too large a gadget either, since the middle of each half of the frame should fall into the center of the pupil. This parameter must be adjusted using lenses, moving them closer and further away from each other.
- Can't do homemade helmet for virtual reality without lenses. There should be two pairs of them. It is better to choose glass of large diameter. This is due to the fact that their minimum distortion is closer to the center. The greater the distance, the more the image is distorted. The small diameter of the glasses will not be able to cope with the difference between the pupils and the center of each half of the picture.
- You will need construction polyethylene 20 mm thick. It should be of medium density.
- In addition, you will need double-sided tape, as well as regular or vinyl film.
- The frame of the helmet will consist of cardboard. It should be micro-corrugated and 2 mm thick.
- To secure the glasses you will need a wide belt or elastic band. It is convenient to use the Velcro fastening.
- To make a helmet, you need drawings. To create them you will need tools for drawing and cutting materials.
All materials are inexpensive, and therefore the helmet will cost much less than a store-bought one.
Making a helmet
Before you make a virtual reality helmet with your own hands, you need to download the Cardboard smartphone application in advance, which will allow you to evaluate the quality of your future helmet.
Next, you need to start making the frame for the first pair of glasses. It is made from a sheet of foam plastic. It is recommended to adjust the lenses so that the distance between your eyes and the phone screen is minimal. To do this, the smartphone is placed on the table and the focus is adjusted using lenses. Once the required distance has been found, the holes can be cut using a centrifugal drill or a compass with a utility knife.
Next, a frame is made for the second pair of lenses. Each glass should be placed in polyethylene. With its help, a 3D effect is obtained. To achieve it, you need to choose the right focus. This can only be done by experimenting with glasses.
After this, you need to make a frame for the helmet. Here it is important to adjust the box to your anatomical features: the shape of the nose, skull, vision. The main thing is that the helmet is comfortable.
It is also necessary to consider the sound output. This is where you should choose good headphones.
The next step is the correct positioning of the phone or tablet screen.
Important! The axis of symmetry, located horizontally, must coincide with the height of the represented line between the pupils.
The screen should be approximately 4 cm from the near edge of the eyepiece. Therefore, it is necessary to decorate the top, bottom, and sides with foam plastic. It should look like a kind of box. The gadget screen is placed in it.
After everything is ready, you need to once again adjust the focus of the lenses and, if necessary, correct the location of the device.
The final stage is the production of the outer frame of the helmet, which is made of cardboard. It turns out to be a box with a lid, inside which is located mobile device. It protects the fragile foam device from damage. In addition, it is the cardboard frame that holds the bulk of the smartphone or tablet and presses it against the foam.
Now all that remains is to attach the rubber band fastening. You can attach it to the frame using double-sided tape.
You also need to make a hole for the USB cable.
The virtual reality helmet is ready! You can safely download games with a 3D effect to your device and enjoy the exciting story.
Today I will tell you how to make an HTC Vive from virtual reality glasses for smartphone cardboard with your own hands, spending only 7 thousand rubles, while the original virtual glasses HTC Vive costs about 70 thousand rubles. The big advantage of these expensive virtual reality glasses is the presence of remote controls, but this is not a problem, since today they can be replaced with another device. For example, the same LeapMotion sensor, with which your hands will replace remote controls.
So, in order to make a helmet for 7 thousand rubles, the following devices will be needed:
You can use your own smartphone, you can buy a LeapMotion sensor for about 5 thousand rubles, and virtual glasses with good effect diving will cost you around 2,000 – 3,000 rubles. Thus, you will make your own HTC Vive, which will cost 10 times less than the original one.
From software we will need:

First you need to install the Vridge RiftCat program on your PC and the corresponding application on your smartphone. This program will help you connect your computer to your smartphone and emulate connected HTC Vive VR glasses. To do this, connect the phone to the PC with a USB cable, go to the settings on the smartphone, and activate the USB modem mode. After which the computer and smartphone will enter the common local network. You can, of course, not connect your smartphone to your PC using a USB cable, but simply use Wi-Fi. Why did I choose a USB connection? So, you can achieve best quality images transferred from a PC to a smartphone, the picture quality will be relatively worse via Wi-Fi. Now open RiftCat on your smartphone and connect to RiftCat on your PC.

Next, you need the LeapMotion sensor, which has already been mentioned, we also connect it using a USB cable to the PC and install the Leap Motion VR Orion Driver and Leap Motion Desktop Software mentioned above.
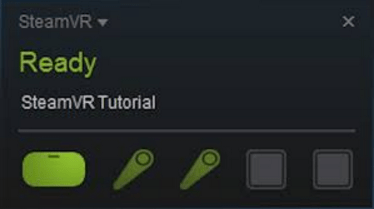
You will also need to install the Steam program on your PC and create an account for yourself. In Steam, go to the “Library” tab and go to the “Tools” section, find SteamVR in the list and install.

And at the end we install Leap Motion Steam VR Driver.
After connecting all our devices and installing all the necessary programs, in the Vridge RiftCat program on the PC, click Play SteamVR Games, at this moment a window will appear, the emulator will start, and then it will automatically start Steam program VR and if everything is configured correctly, the icons for glasses and remote controls in SteamVR will glow green. Then you can click on the title of the SteamVR window and perform “Room Setting” by selecting a small room, and the distance from the floor can be specified as 180cm. Here we have everything connected and working. Now on Steam we launch any VR game compatible with virtual glasses HTC reality Vive. In order to start playing, you need remote controls, but in our case, as I already said, my hands will replace them. Next, we insert the smartphone into the virtual reality glasses and glue the LeapMotion sensor to the front of the glasses.
Having launched the game, my hands began to emit remote controls. Flexing index fingers, you will emit a trigger pull. There is a minimal time delay, that is, on the computer the action will occur a little later than you actually bend your fingers, but this is not scary. Also, unlike remote controls virtual glasses HTC Vive, your hands must be in front of you, within view of the touch camera. By spreading your hands to the sides, the camera will lose sight of them, and the remote controls will disappear in the game, so we recommend keeping your hands in the field of view of the touch camera. You can shoot in games by bending your index fingers. Aiming in games with your hands, of course, is not very convenient, but in principle you can quickly get used to it. We recommend that you familiarize yourself with the available gestures on this site.
I believe that this technology is suitable for those who want to get acquainted with virtual reality glasses on a computer without spending 70 thousand rubles. Of course, this scheme requires a fairly powerful computer, with Intel processor Core i5 and a video card of at least Nvidia GeForce 750. I do not recommend trying to connect the glasses to a laptop, unless you have gaming laptop. In general, virtual glasses will not work with a laptop at all, and with some, even if you manage to connect them, you still won’t be able to play comfortably.
Buy LeapMotion sensor and virtual reality glasses for your smartphone at in this case, I think it’s possible to get acquainted with the games and the operating technology itself. Of course, you can get used to playing without remotes, but the effect will be completely different. You won't get in this option those emotions that could be obtained with virtual HTC glasses Vive. The very inconvenient thing is that with the sensor you only need to keep your hands in the field of view of the touch camera, while with the HTC Vive remotes, you can wave it as you please. If you want to play fully and save money, then I advise you to buy RazerHydra remotes instead of the LeapMotion sensor, which are well tracked in space, just like real remotes from HTC Vive. Using RazerHydra you can play as comfortably as using HTC Vive remotes.

So, in this article I told you about how to create an inferior, of course, but good replacement for expensive virtual HTC glasses Vive, saving 10 times. Buy yourself a LeapMotion touch camera or RazerHydra remotes, virtual reality glasses for your smartphone, install the necessary programs on your PC and enjoy virtual reality games for HTC Vive virtual reality glasses with us! Order everything you need on BESTVR!
Three-dimensional images have always attracted people with their unusualness and closeness to natural perception. When going to the cinema, many people prefer to go to a session with 3D technology, as this allows them to immerse themselves in the atmosphere of the film as much as possible.
How to make virtual reality glasses with your own hands
Kit for Google builds Cardboard. Everything except lenses can be made by hand
Today there are many technologies for creating volumetric perception, but most devices are different high cost. Is it possible to make VR glasses at home, and what is needed for this? In principle, quite a bit: ordinary office supplies that are easy to buy in a nearby store. The situation with lenses is more complicated, but this part can be found if desired - the easiest way is to order it from the Chinese on Aliexpress.
First of all, it is important to understand that virtual reality glasses for phones should be made with the utmost care, in strict accordance with the drawing. If there is the slightest deviation from the diagram or the use of incorrect materials when making virtual reality glasses from cardboard desired effect will not be achieved.
What materials are needed

Many people ask whether it is possible to make full-fledged virtual reality glasses out of paper? In principle, yes, if the paper is very thick. It is better to stock up on normal cardboard for such purposes if you are not making the device for a couple of weeks. To make the device look more or less aesthetically pleasing, use double-sided cardboard - regular matte on one side, glossy white on the other.
It is not difficult to make a virtual reality helmet with your own hands. To do this you will need the following materials:
- thick high quality cardboard
- sharp utility knife
- round lenses for a virtual reality device (it’s better to order on Aliexpress)
- Velcro or other fastenings for cardboard
It is better to cut out the parts with a stationery knife, since it is difficult to work with thick cardboard with scissors without creating torn edges.
Virtual glasses made of cardboard will last much longer if the material is dense and uniform. It is not recommended to make a helmet from corrugated cardboard, as over time it will begin to delaminate and quickly become unusable.
Google Cardboard Drawing
To make a fashionable device, you will need an exact drawing of virtual reality glasses, which can be downloaded on the Internet by entering cardboard, VR glasses or something like that into the search bar. In the same way, you can later find the desired smartphone application in the store for your platform.
Schemes for virtual reality glasses made of cardboard, drawings and drawings are presented in convenient form. All you need to do is download them to your computer, print all the details on a printer (on plain paper), and then transfer the resulting patterns onto cardboard. Following the diagram and using the drawing, you will receive a device correct sizes in the right proportions.
Assembling glasses
In order to make a virtual reality helmet, you should carefully cut out all the parts of homemade VR glasses from cardboard, bend them in the designated places and assemble the entire structure together, according to the attached instructions. Pre-prepared lenses should be inserted into special holes and fixed.
As a result, you should get a neat and compact box, similar in shape and size to the original device for viewing 3D media.
Phone setup
In order to enjoy full viewing of media files in the new device, you will need special software for your smartphone - for example, Google Cardboard, which can be downloaded from mobile Internet markets. Once you have installed the application, launch it by selecting necessary materials, secure the phone well in a homemade helmet and start watching.
Things to do with a helmet

After assembling the device, most users have a logical question: how and what to watch, is it possible to turn on games, etc.? Download special application for Android or iOS, you can watch movies with 3D support, as well as play certain games.
In order not to hold a homemade helmet in your hands, you can attach a pair of comfortable straps to it for a firm fit on your head. Do not forget about securely fastening the smartphone in the device - the cardboard cover into which it is inserted should be equipped with double-sided Velcro for clothing, buttons or other fasteners.
Conclusion
If you have minimal manufacturing skills homemade devices, the question of how to make virtual reality glasses will not take you by surprise. Having a minimal set of stationery and materials on hand, you can make 3D glasses for your smartphone with your own hands, and this device is not much inferior in functionality to its expensive analogues.
Regarding external characteristics- everything is in your hands. Paste over homemade glasses beautiful paper, color the gadget in bright colors, turn it into a monster of new technologies, and surprise your friends and acquaintances.
This video tutorial will show you how to make cardboard 3D virtual reality glasses. To do this we need a phone, two lenses, a pen, a ruler and carton(thick cardboard). It is recommended to use lenses 5-7x, diameter 25 mm. The article consists of two parts. The first contains the basic steps for creating glasses, the second contains recommendations for improving the product and a description of applications for 3D games.
Buy ready-made cardboard glasses you can in this Chinese store.
From cardboard you need to cut out all the parts that will be needed to create the glasses. To do this, it is very convenient to use the diagram, which you can download from the link. It will make everything much easier to do. You can download this drawing for printing on a printer.

Now, according to this diagram, you need to draw out all the details on cardboard and cut them out using scissors. Next you need to collect it all, which is, in principle, not difficult to do. In all places where there are bends, you need to bend the cardboard and connect everything using hot glue. Next you need to insert two lenses.
If you made the hole a little smaller than the lenses themselves, then you can simply place them very tightly and they will not fall out, but just in case better a couple drops of hot glue.
Now we need to download an application called cardboard to our phone. There's a lot in it different games for 3D glasses and videos. You can download the demo version from the Play Store.
Let's finish the 3D glasses. We insert the cardboard with lenses and we are all ready!
Go to the cardboard program. There are two sections here. There are many different games and videos here. We launch the one we like and insert it into our 3D glasses and enjoy virtual reality.
Since the phone has a built-in accelerometer, we can move our heads and the picture will also move.
There are many applications for these 3D glasses on the play market. Make these glasses or buy ready-made ones. In general, this cannot be explained, it’s very cool! Until you try it yourself, you won’t understand what it all looks like.
How to make a reality simulator for a personal computer
Next, we will show you how to make a reality simulator for a personal computer, these are virtual reality glasses like the Oculus Rift. To do this, we need straight hands and a well-functioning head and motivation to create homemade products. If you do not have any of these qualities, but have money, then it is better to immediately buy ready-made virtual glasses.
We will need a virtual reality helmet, which you could make using the video tutorial above. The current version adds larger lenses, head mounts, and Velcro to help the phone hold better. In general, this craft is assembled more carefully.
Where can I find lenses? You can take from the magnifying glass which contains two lenses that are perfect for these virtual glasses.
We will need a more powerful computer and a telephone with good characteristics so that all programs work stably and do not freeze.
You need to download a program called droidpad to your computer or phone. This application will help us use our phone as a virtual joystick. Namely, use the phone’s accelerometer itself. This application supports two types of connecting your computer to your phone: using USB and WiFi. We don't need it using usbi, because the phone will be inserted into the virtual glasses. Therefore, we will use the wi-fi method. It is desirable that the Internet speed be good and stable.
Now we have the most difficult work ahead of us. We need to calibrate the accelerometer of the iPod phone to our computer. After installing this program, the phone will be used by default as a virtual phone in games. Certainly not all games will be supported. Instructions for calibrating a phone with a computer are available on the 4PDA website.
After we have calibrated according to the phone instructions for the computer, you can go into any game and test your magic glasses. The mechanism of this application is that using the phone's accelerometer, when you turn it, the screen rotates. It turns out to be a replacement for a computer mouse. Additionally, we need a program called cardboard. This program is needed to make the phone screen split in half. There is a special function, be sure to find it and configure it correctly so that everything works for you. Check that the phone screen is correctly divided not only on the desktop, but also in other programs.
Finally, download the latest program called Splashtop. This is a program so that we can view the computer screen through the phone. How to set up the program, instructions are also available on the 4PDA website.
After we have downloaded the program to the computer and phone, we need to launch the droidpad program to control the accelerometer, the cardboard program to divide the screen in half. These two programs must be running in the background. You need to open the Splashtop program and check if everything works. Launch the game on your computer and enjoy.
There is one caveat - the higher the pixel density on the phone, the clearer the picture will be. Besides games, of course, you can watch movies.
Everything voluminous is becoming fashionable, and many people want to have it in their home for creativity.


